How to Get Started Customizing, Figure Repairs, Other Advice
Aug 14, 2013 12:14:15 GMT -6
BrownDynomite, Ascat, and 2 more like this
Post by Branjita on Aug 14, 2013 12:14:15 GMT -6
Disclaimer
If you decide to start customizing, you do it at your own risk. Some things you'll read here may be dangerous. You shouldn't attempt anything mentioned without adult permission and supervision. DragonBall Figures and the writers of advice here are not liable for any injuries or damages that occur as a result of or in connection with attempts to follow suggestions written in this thread nor anywhere else on this website.
SUGGESTED MATERIALS
Don't waste your time and money on improper materials. I did the first few years I customized, and well, I regret what I had to learn along the way.
Clay:
Go ahead and buy some Aves Apoxie Sculpt and/or Aves Apoxie Clay. Both are extremely easy to work with, and take about 2 hours to get hard. For Sculpt, I recommend the color pink because the consistency is good and you can easily see what you're doing and paint over it. I don't recommend white, it is too sticky and doesn't have as consistent and smooth of a texture. For Apoxie Clay I recommend the Native color.
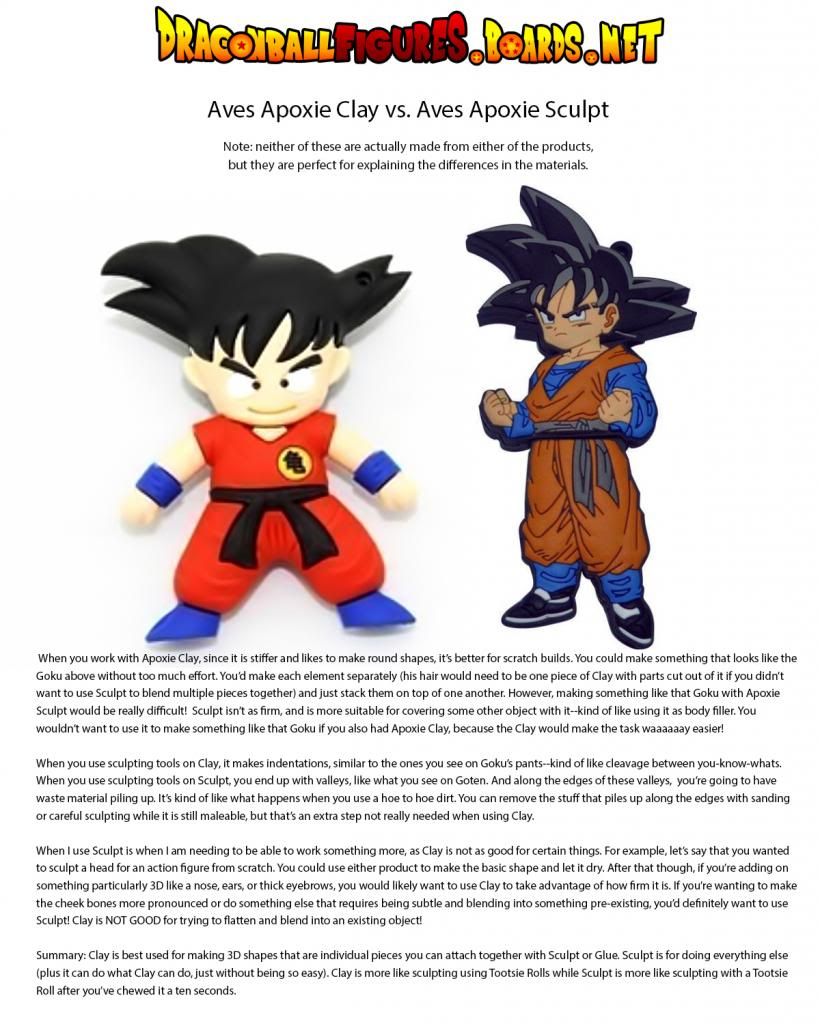
What's the difference between the two? Clay is easier to build things from scratch with. Sculpt is easier to use to modify something that already exists; like adding a layer on top of something, make a repair, etc. Want to sculpt something from scratch like a weapon, hair spikes, a head, a finger, a feather, a cape, or armor? Choose Apoxie Clay. Anything else, choose Sculpt. Only want one or the other? Choose Sculpt if you just want to modify existing parts, Clay if you want to sculpt things from scratch. Clay holds detail better because it is a stiffer material. It's hard to relate the two to something you'd be familiar with, but I'd say that Clay is like working with a Tootsie Roll or Starburst. It is always stiff, and joining two pieces of it together is not seamless without effort. It also is not very sticky after the first dozen minutes. Sculpt is more versatile, it's like getting chewing gum off your shoe at first, turns into kind of a heavy marshmallow, then eventually goes into a stale rock hard heavy marshmallow mode. It remains sticky for awhile and you won't have to use super glue in most cases. You can add water to Sculpt and make it smooth more easily, or even get it to the state of being like cake frosting almost (an annoying state unfortunately, but useful). Both dry rock hard and have zero flexibility.
I buy mine direct from www.avesstudio.com because it's the only place to get pink Apoxie Sculpt, and to me, pink is worth it!
Before using Apoxie, be sure to read the product instructions. I recommend you wear vinyl gloves when mixing the product as well as while sculpting with it, so your skin doesn't absorb anything or interact with the chemical reaction involved.
Required Tools:
I absolutely HATE IT when somebody writes advice and uses BS terms like "mild soap" (who in their right mind knows whether their soap is mild or not?!) so I'm going to tell you exactly what I use, whether it's a free endorsement for the product or not.
You'll need gloves. Feel free to shop around, because my suggestions aren't necessarily the BEST, they are just what I have and what I use.
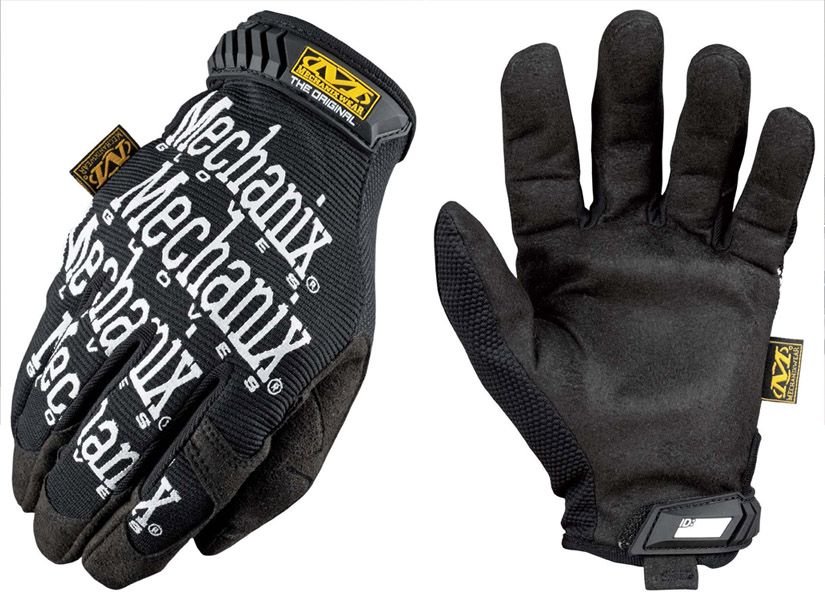
My preferred type of gloves for doing x-acto knife work are mechanic style gloves you can get from Target and other places. You'll want to protect your hands when cutting and sanding. You should get many years out of a good pair, or several weeks out of a cheap piece of crap pair. Expect to spend $15 to $20 on a good pair. What is important is having good padding on the finger tips on the palm side, because that's the most likely place you are are going to hurt yourself. Don't misunderstand what I just said. You don't need or want padded palms. You need padded finger tips. What is secondarily important (and the reason I use mechanic gloves) is having protection for the top of your finger tips and your index finger's knuckle because those are two areas you can end up hurting too (though very rarely). You want the gloves to fit and be flexible, but thick on the finger tips on the palm side especially... and most especially... on the thumb. I use Mechanix ones currently, and my only complaints are that the velcro sometimes gets stuck on my clothes and couch, which damages the cloth, particularly on the couch, and I wish the thumb material was thicker. www.amazon.com/Mechanix-Wear-MG-05-010-Original-Glove/dp/B0001VNZQY
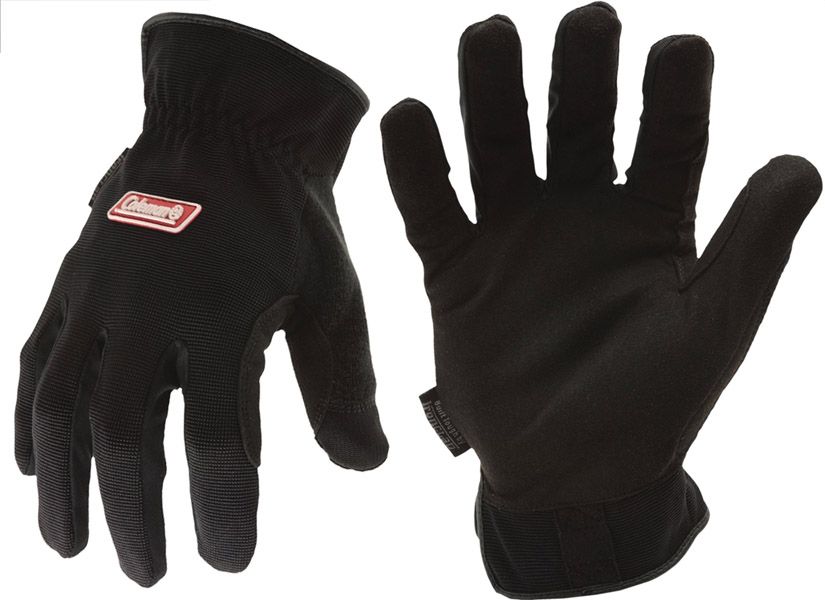
I have a pair of Coleman Outdoor Utility gloves, and I haven't used them for customizing yet, but they lack velcro (which is nice) and have decent palm-side finger protection. They lack extra protection on the tops though, but that isn't incredibly important. I think these are good, but they aren't as protective as Mechanix. www.amazon.com/Coleman-COOG-04-L-Outdoor-Utility-Glove/dp/B006NYJ382/ref=sr_1_sc_3?s=hi&ie=UTF8&qid=1402449009&sr=1-3-spell&keywords=colman+gloves
Avoid using Stanley Xtreme gloves, because they are pieces of crap that will develop holes in the finger tips very quickly. They are garbage for these purposes. AVOID THESE. They have heavily padded palms, so they are good if you are swinging from tree branch to tree branch like a monkey... but you're not.
www.amazon.com/Stanley-1879-50-Xtreme-Utility-Xtra-Large/dp/B002PHLZUU/ref=sr_1_1?s=hi&ie=UTF8&qid=1402449713&sr=1-1&keywords=stanley+xtreme+gloves
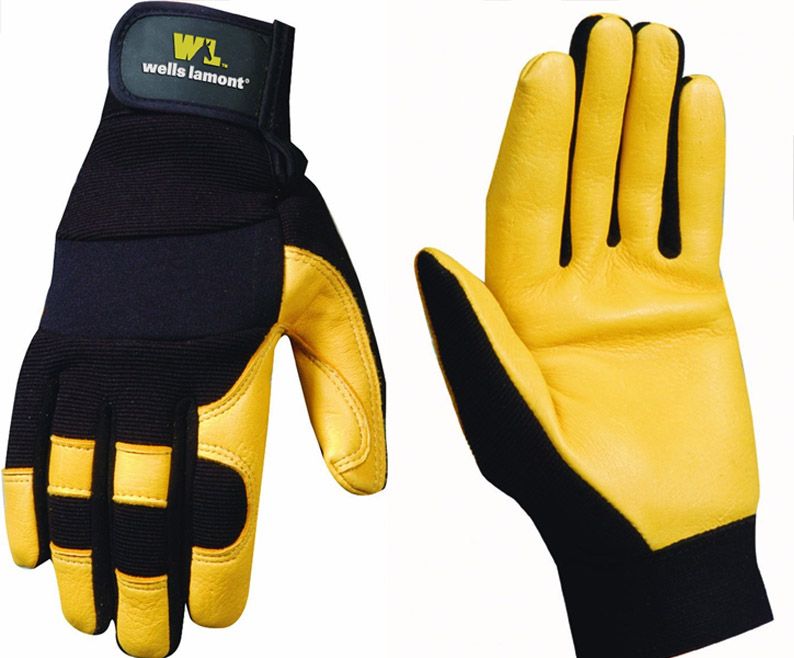
If you are going to be using a dremel, I recommend even thicker gloves to protect your finger tips. I wear Wells Lamont gloves exactly like these, but I do not wear them when doing other tasks because the Mechanix gloves (and similar) are adequate for preventing an x-acto knife blade from hurting me very much, and these aren't as protective against blades. I wear these only while dremeling. And although these are thicker, I don't think they are as durable as the Mechanix gloves. The thick leather on the finger tips sure has saved me from some pain via my Dremel... these may not be the best recommendation due to lack of durability, but if you get thick gloves that are durable, like ones capable of being used when working with welding and metal, you are going to lose flexibility, and then you're going to have a hard time holding your Dremel and doing delicate tasks.
www.amazon.com/Wells-Lamont-3210L-Deerskin-Spandex/dp/B000BPUBJE/ref=sr_1_9?s=hi&ie=UTF8&qid=1402448404&sr=1-9&keywords=wells+lamont+gloves
You absolutely have to have Safety Glasses. If you don't wear them while you're customizing, I'm sorry, but you're an idiot. < duuuuuuur )
Best $15+ you'll ever spend, and your eyes are important. Take it from somebody who didn't start wearing them until 2002 after having an x-acto knife blade break and stick him in the eye. < arrrrrrrr! )
Not fun! And a painful recovery process! Get a pair of fancy ones from a hardware store that look like wrap around sunglasses from the '90s. Don't get ones for shooting guns or going fishing or something. If you get small ones that look like sunglasses, you are barely protecting your eyes. If you get chemistry class goggles, you'll fog up and be uncomfortable. If you get cheap ones, you'll be uncomfortable in 5 seconds. I wear the ones I have, the entire time I am customizing (hours and hours) without discomfort. They protect your eyes from some glue fumes, paint splatter, your x-acto blade breaking, and tons of sanding dust. If you really want to be protected, get a face shield. I've considered it, because it isn't much fun having a blade break and the blade hit you in the cheek. I don't know what brand would be good, but they look like this:
www.amazon.com/3M-90028-Professional-Faceshield/dp/B000BO6RIE/ref=sr_1_fkmr0_1?s=hi&ie=UTF8&qid=1402451867&sr=1-1-fkmr0
You need to find a pair that will fit your face, which can be difficult, because they generally aren't in packages you can open and try on. Tip: bring your favorite pair of sunglasses in the store with you and compare the dimensions and curve (from an overhead view) to the glasses. The brand of mine is NEBO, I recommend them. I have a relatively wide face, a bigger than average head (size 7 and 3/4 baseball cap size or the 2nd to last setting on a one-size-fits-all adjustable cap), a somewhat flat forehead, but rounded brow area. If you have a very flat face, you will not like these according to an Amazon review. If you have a very narrow face, you may not like these because the glasses may not fit your small face. I just bought a second pair 12 years later, and the design has barely changed, and they kick ass for my type of face. Only $9 from Walmart (not sold in stores, online only), but $30 everywhere else. Get them.
www.walmart.com/ip/Nebo-Tools-X-Lens-Clear-Anti-Fog-Glasses/28378835
www.amazon.com/Nebo-4178-X-lens-Safety-Glasses/dp/B00577US7G/ref=sr_1_10?ie=UTF8&qid=1402450737&sr=8-10&keywords=nebo+glasses
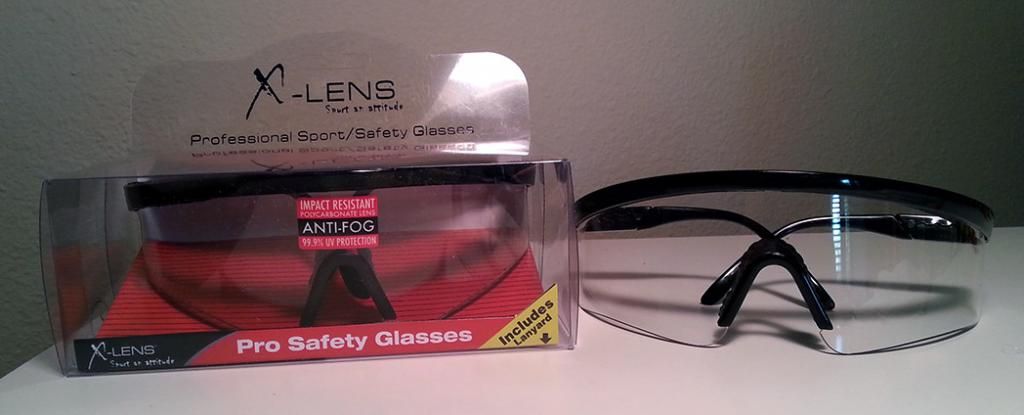
I'm going to wear my new pair when sanding, because my old pair tends to fog up when I wear a dust mask. I'm going to wear my old pair for everything else.
Sculpting and Dismantling Tools:
Spend a bit of money on some sculpting tools made of metal, silicone, or plastic. All work well with Apoxie if you put a thin layer of Vaseline (Petroleum Jelly) on them and they won't stick to the Apoxie. I am not very happy with my metal sculpting tools because none of them leave a rounded edge, so they all leave square grooves. So I've ordered some plastic ones, and if I don't like them, I'll get silicone ones.
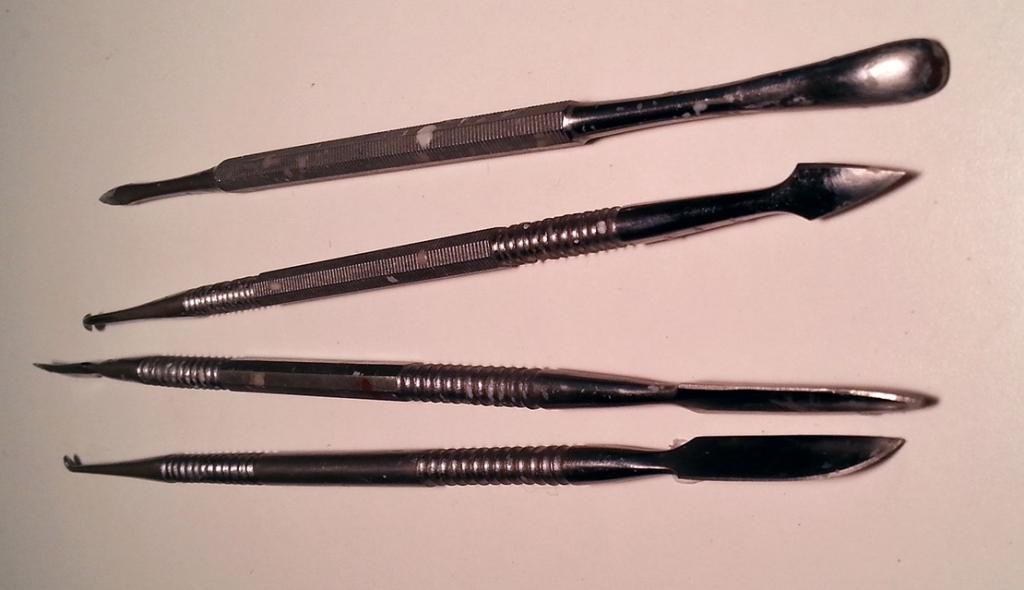
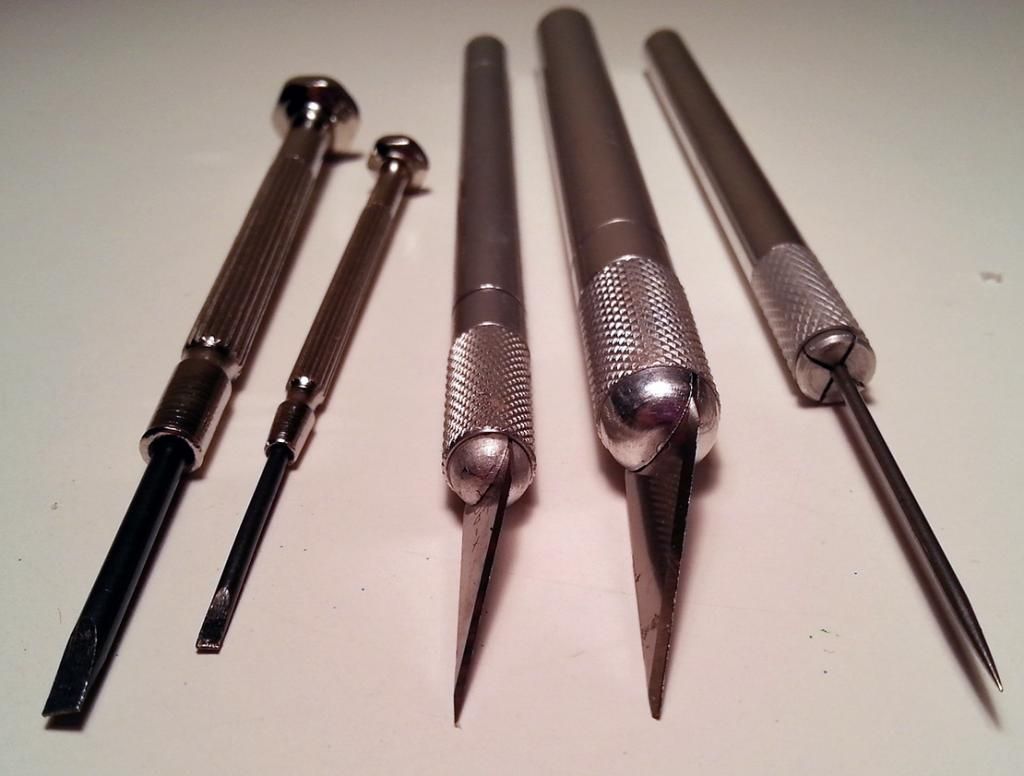
You'll need an x-acto knife or several for just about everything. I recommend the Medium Duty knife (thick metal handle) with #2 blades. You'll use this for chopping and most tasks. You'll also want a Light(?)/Normal Duty knife (about as big around as a pencil) with #11 blades. You'll use this for just about everything else that needs more precision because the blades are thinner. You might also want one of the knives that looks like an ice pick, though they are hard to find. It's useful for making holes (like a guide hole for a spot you want to drill), but you could use a nail instead if you can't find one. Get a small set of screw drivers. They usually sell them at dollar stores. They come in sets of like 5 to 6 little tiny metal screw drivers of various sizes. You'll mostly only need flathead ones, not phillips head.
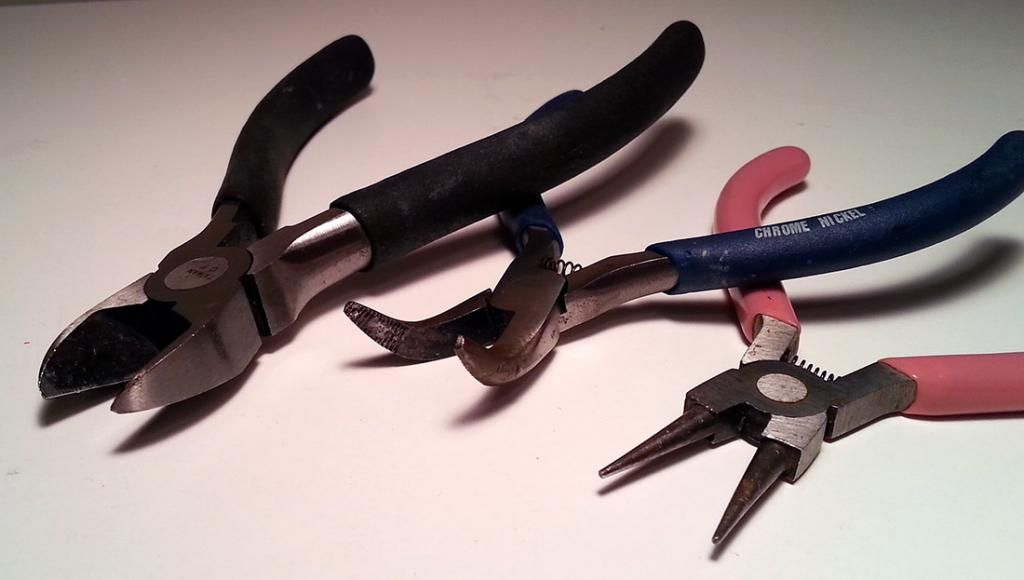
You'll want a pair of very small needlenose pliers mostly for use in popping torsos open on Irwin figures (you'll need them for Jakks too sometimes). You'll need a pair of wire cutters for cutting things too hard to cut with an x-acto knife. I use a curved pair of needle nose pliers for a lot of things to save me from having to hold things at an awkward angle.
Assistant Tools:
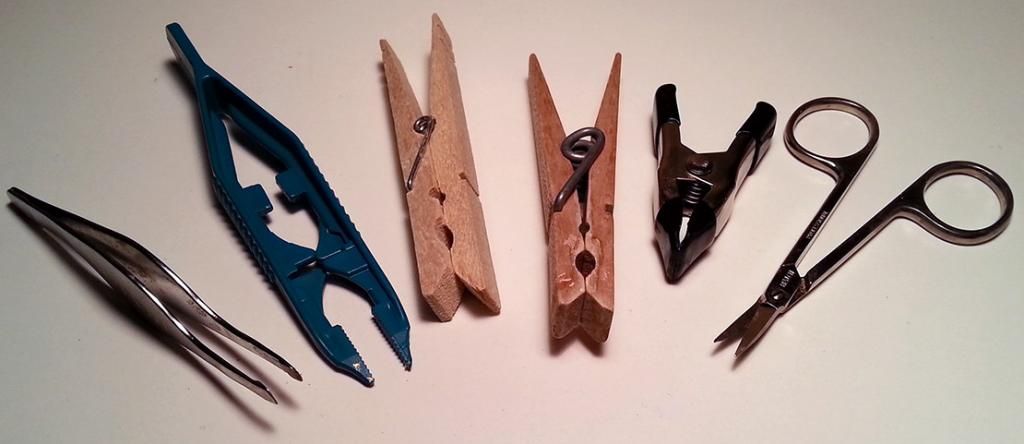
Clothespins and small clamps are good for holding things you're painting and for holding things while they dry. Cuticle scissors for cutting finger nails are the best scissors you can buy for cutting paper and other small things with precision and they have curved blades. I sometimes use tweezers for holding tiny pieces I am trying to glue onto other things.
Sanding Tools:
For sanding, you have three options and you may want all three if you're like me. Let's start with the most expensive options to the cheapest options.
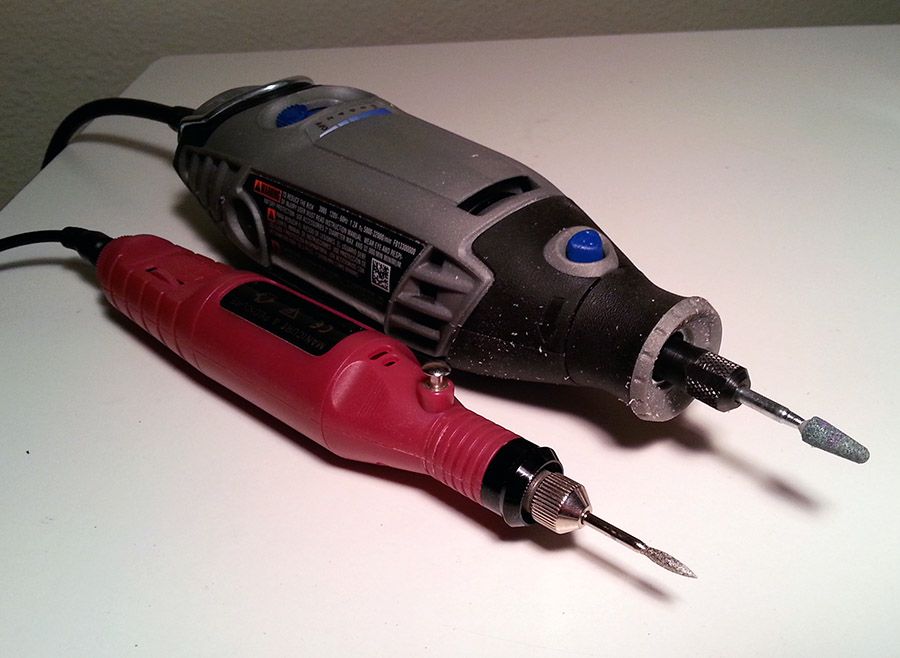
A dremel (has to be one with multiple speeds) is the most powerful and is what you'll use for heavy duty destroying operations that take forever by hand. You'll end up spending about $100 to $150 on one and the attachments/tips when all is said and done. If you'll be sanding plastic, you'll want to use one. You'll want to either run a small vacuum with the hose between your knees while you are using one and/or buy good quality dust masks to wear on your face. Dremels tear stuff up and throw the dust everywhere. You will need a shower when you are done, so try to work on multiple figures in one sitting.
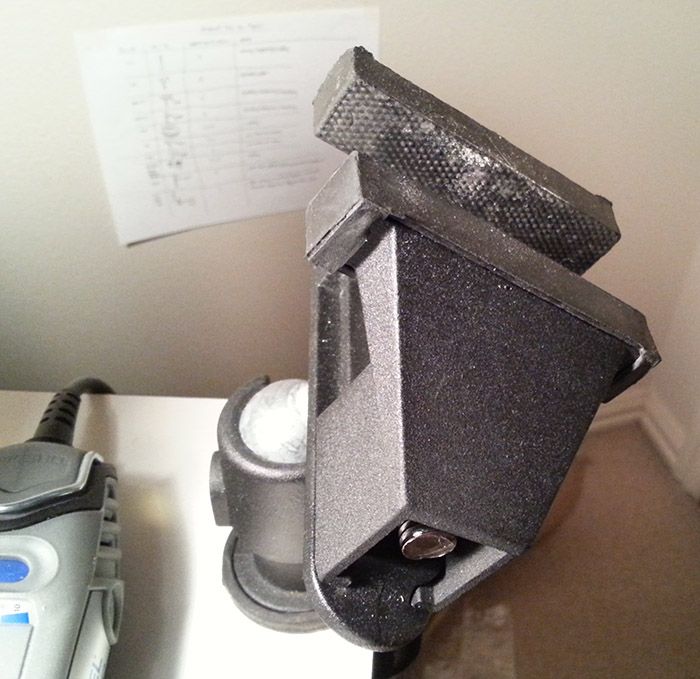
You need to buy a small table vise if using a dremel. You should not hold what you're working on in most cases, even if you're wearing gloves. I did a lot of research and bought the best vice that exists. Don't waste your sweet time or precious money on something else. This thing is legit.
www.amazon.com/gp/product/B003IJLB9Y/ref=oh_details_o01_s00_i00?ie=UTF8&psc=1
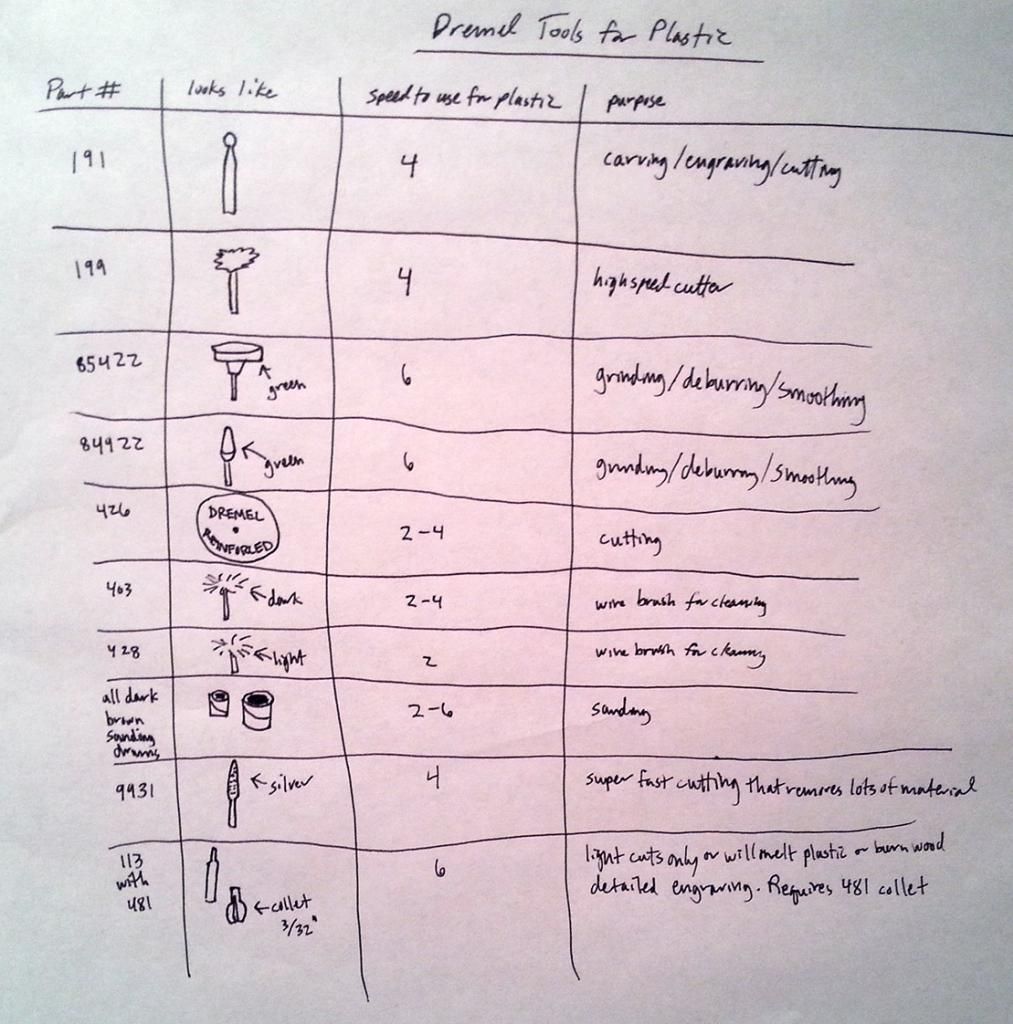
These are the attachments I spent hours researching, inspecting, purchasing, etc. I made a chart for myself so I'd know the purpose of each and at what speed to use them. You can see 84922 attached to my dremel above... it's the most useful tip I own and the one I use most often. The second most useful is the one that will chew through stuff like a maniac. It's 9931. It could probably remove your entire hand if you let it in just a few seconds. Not included on this chart are the tips that work well with sanding Apoxie. Why? Well... I forgot to ever add them and they can be used at any speed. Identifying those tips at stores is easy though, because they are orange (terracotta) in color. You can use those tips at whatever speed you want. I only use my dremel on Apoxie if I made a major mistake and need to remove a lot of dry Apoxie quickly. It makes a big freaking mess if you do this without your vacuum running.
A manicure tool for about $20. It's like a gentle dremel because it comes with lots of tips and because the tips are all gentle enough for fingernails, they don't hurt you and you don't have to wear gloves when using one. I usually turn on the ceiling fan and use the tool over a trash can and blow lightly to keep the dust out of my lungs. When doing a lot of sanding, I keep a vacuum running with the hose between my knees. You'll find this tool isn't very useful for sanding plastic, but it works great on Apoxie and isn't very noisy.
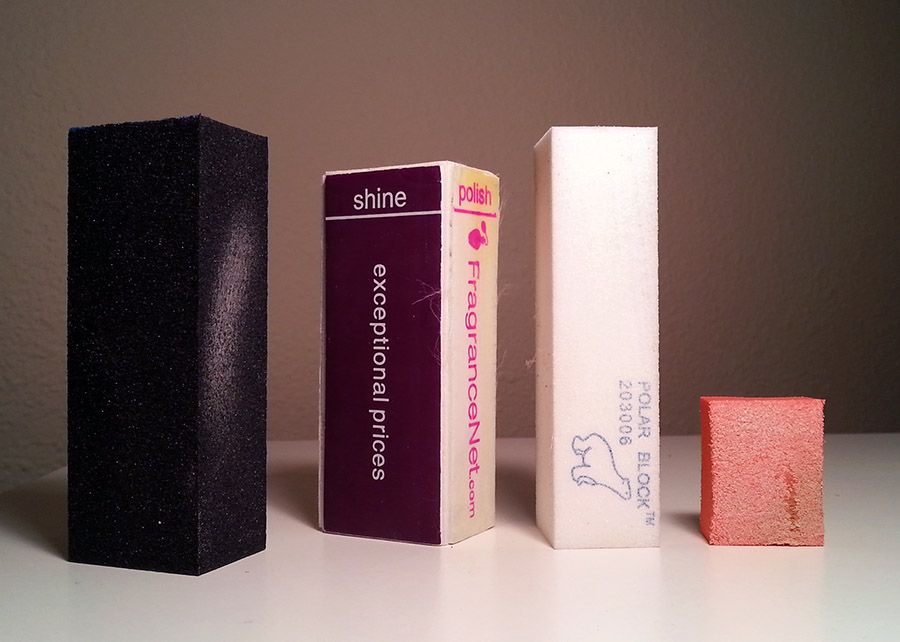
Sanding blocks for about $0.25 to $4. I get mine from Sally's Beauty Supply. They are block shaped 4 sided foam sanding things. I like the white ones that are about the size of a Snickers bar and the "snack size" (lol) orange throw-away type for lighter duty polishing types of sanding. You'll want to use them over a trash can or sink and blow gently while doing it to keep the dust out of your nose. I use the less useful type that isn't very abrasive for times when I need to sand paint lumps out to get a smooth finish (after waiting almost a week for the paint to fully dry so it turns to dust when sanded instead of peeling off).
Glues:
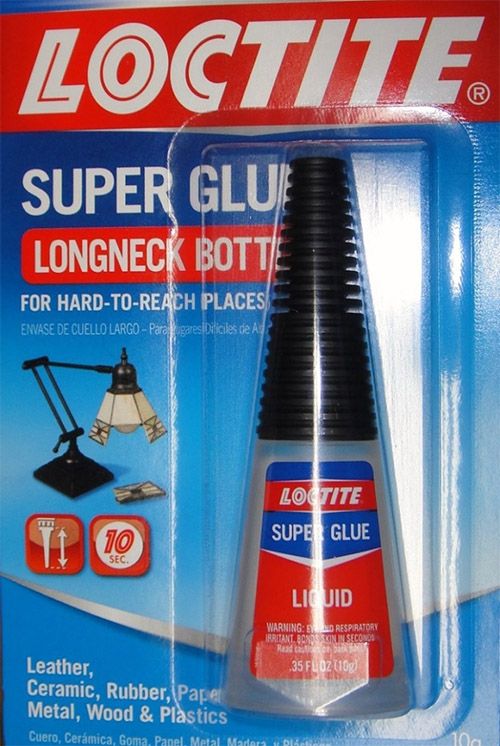
On most figures, you can get away with using Loctite All Purpose Super Glue. It's about $4 at Walmart. Don't breathe the fumes, they hurt to breathe. If you get it on your skin immediately dunk your finger in water. Supposedly vegetable oil helps, but I have never tried it. If you glue your fingers together, immediately pull them apart, don't wait.
Any time you cut an arm in half to shorten it or swap hands on a figure though, you'll find that just moving the arm can break the super glue's bond. In this case, use Epoxy.
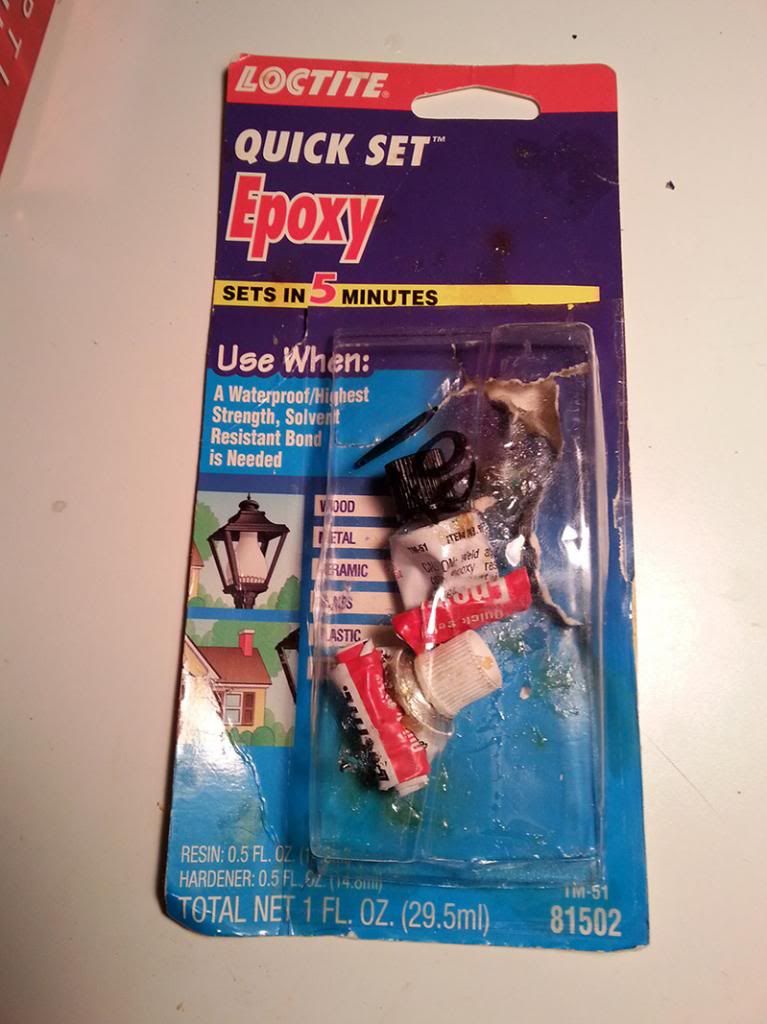
It comes in two tubes or a syringe. I prefer the two tubes type even though it's most likely sloppier. I'm not sure if the syringe type is a one-time-use or not, as I haven't used that type, but you should easily get 10 years out of two small tubes (like I have). Epoxy is a permanent solution, dries clear (yellows over time, but you'll be painting over it anyway usually), and dries in about 5 minutes. You can put a drop from each tube on a plastic plate and mix it with a toothpick and apply it with the toothpick or a plastic knife.
Paint:
I prefer Delta Ceramcoat Acrylic Craft Paint over any other option I've tried. It comes in a billion bright color, doesn't have lumps in it like the cheaper kinds, and is super easy to work with. There are more expensive options like Gamemasters and Model Masters, but DC will get you finished without much investment. It's between 75 cents and $1.50 a bottle. Sold at Hobby Lobby and some Michaels. If you can't find it, Folk Art paint is just fine, it's typically thicker though, so you have to shake it more thoroughly and mix a little bit of water on your paint palette (a plastic plate) before applying it or you'll get brush strokes on your figures. What I do is actually put a few drops of bottled water in it and shake it up, but when I use it, I still have to dilute it, because it's very thick. Both DC and Folk Art come in plastic bottles you squeeze and acrylic paint has basically no odor.
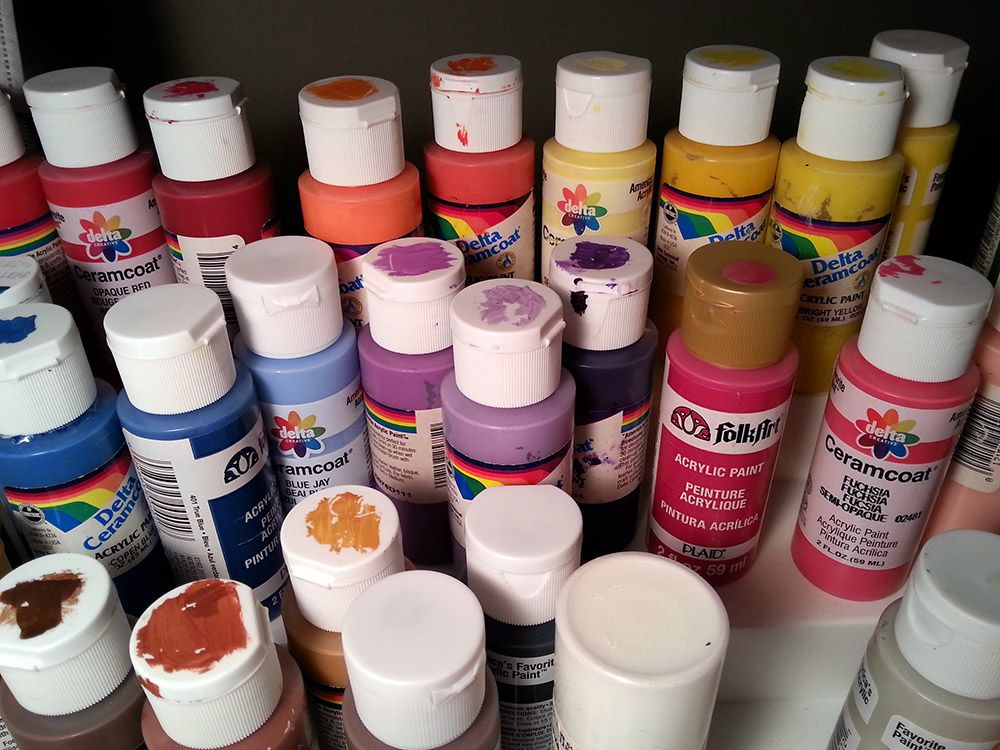
I always put my paint one drop at a time on a throw away plastic plate that I use for several months at a time. I prefer the nice quality SOLO transparent plates more than other types. They are nice and thick and don't distract you with overly bright colored plastic colors.
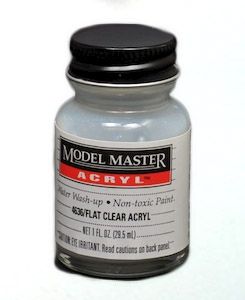
For clearcoat when you're done painting, I heavily recommend Testors Model Master's Flat Clear Acryl. It's $6 at Hobby Lobby and I've not been able to find it elsewhere. It is sold on the model car aisle with the paint there. You open it up, stir it (don't forget to stir it! Yes, it wastes some of it, but you need to scrape the bottom of the jar! I use the handle of my paint brush and then go wash it). You brush this stuff on and it is self-leveling, so you don't have to be fantastically neat and even with it. I don't recommend buying any sort of spray on clear. They suck. And they stink. And you have to spray them. Which sucks. If you want a glossy finish to match DeAgostini figures, I recommend Model Masters Semi-Gloss. It matches well.
Primer:
You usually don't need primer unless you want to be lazy and need to paint something without articulation a solid color pretty quickly. If you do, buy Plastic Primer, or Plastic Paint. Primer is kind of chalky and Plastic Paint is more like the texture of a car's paint.
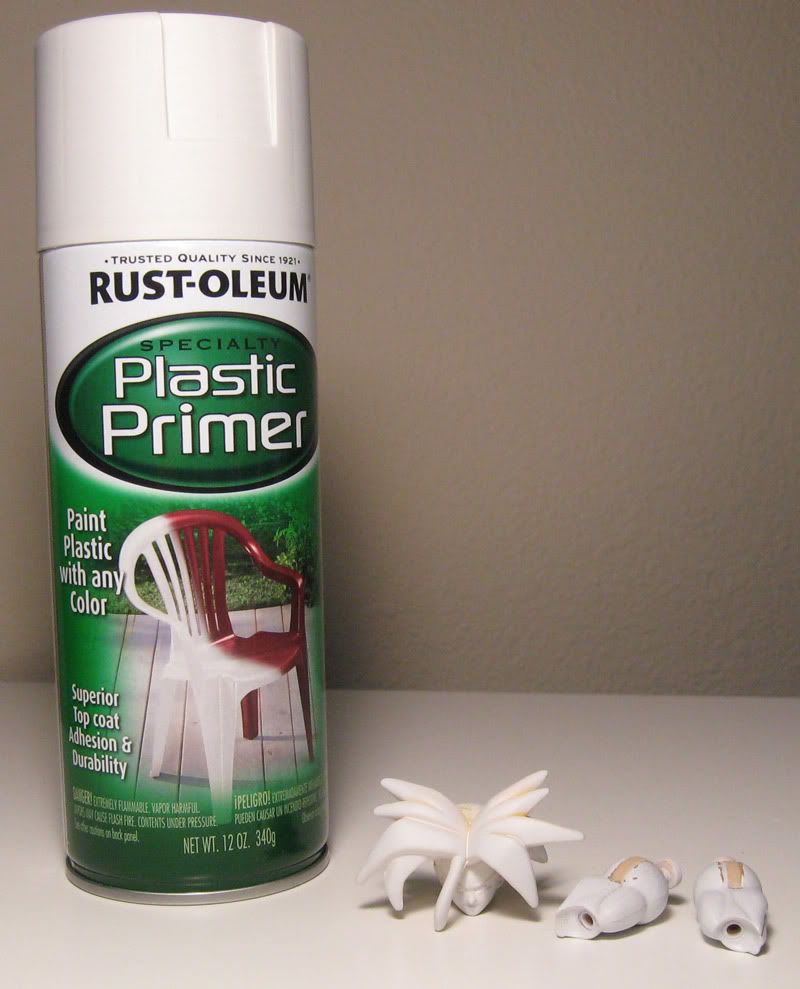
This is a type of Plastic Primer I recommend if you want some. Overall, I consider it primarily useless, as it is not especially durable and makes details disappear.
I actually recommend you get Plastic Paint.
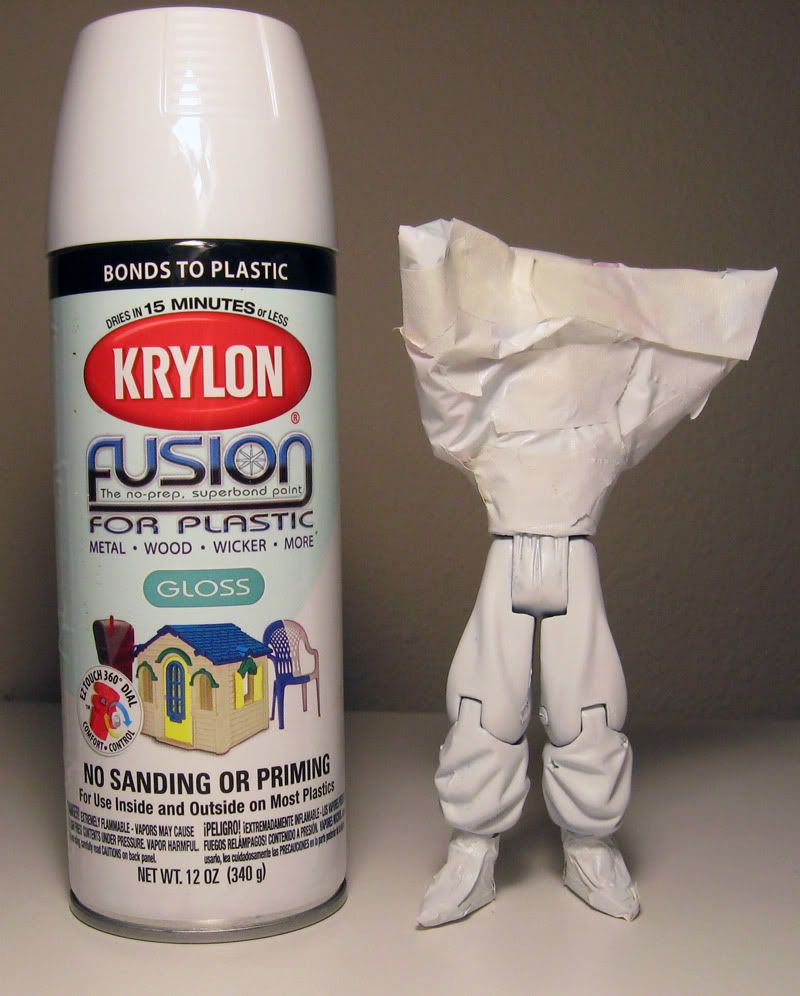
Comparisons are hard to show in pics, but I did my best. Both have a few coats of paint. It's difficult to get even coverage on small things, which is part of why I don't usually use primer or spray paint. I used it on Trunks' head because his head was made of a type of plastic that my paint wasn't sticking to well. I used primer on the arms because I was lazy and wanted to test them. As you can tell, the articulation scraped the primer right off. The Piccolo pants were painted with plastic paint because they were purple and it takes a LOT of coats of white acrylic to cover dark colors, so I saved some time and effort by using plastic paint for the first few coats.
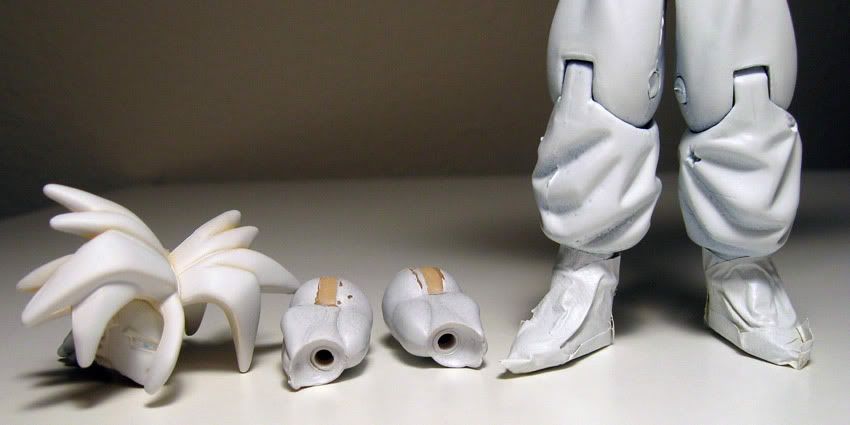
You should be able to see that primer is kind of chalky (looks like pancake batter doesn't it?) and plastic paint is kind of like car paint (in areas that got good coverage). If you are dumb and buy a type of primer that is not specifically plastic primer, the chalky stuff in it is much thicker and almost like lint from your clothes dryer. Return it to the store and don't use it. Only use spray primer/paint that says it is specifically for plastic so it will be smooth.

Paint Brushes:
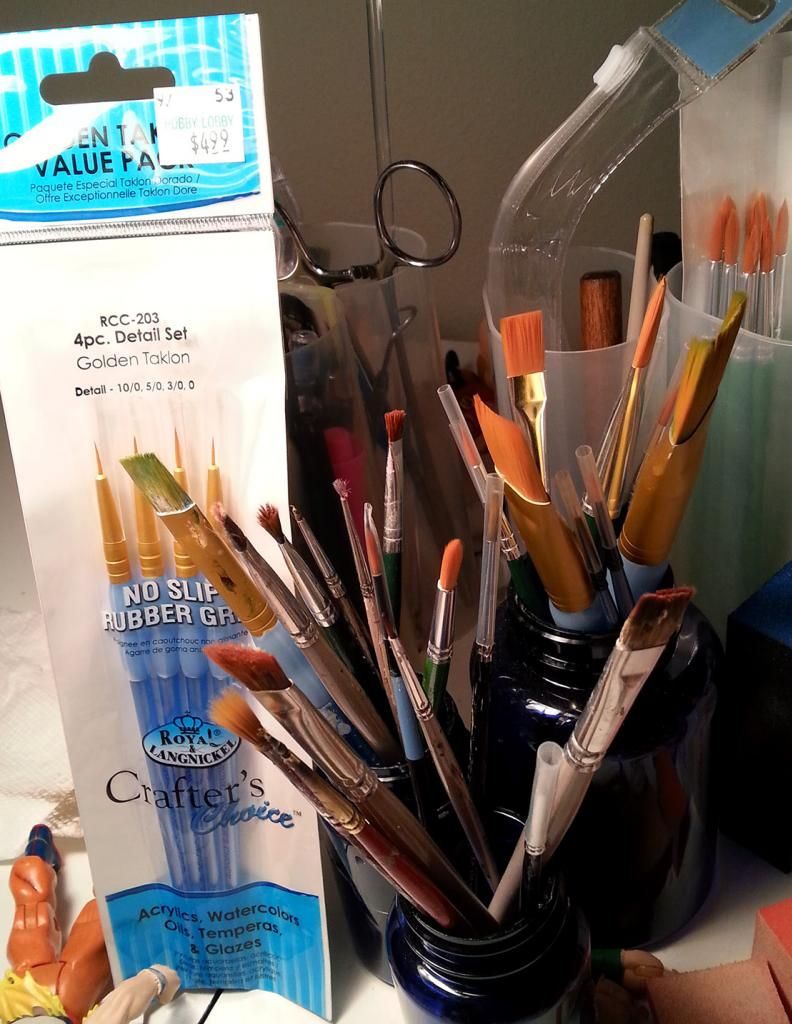
Gold Taklon brushes are what I recommend. You don't have to buy expensive ones either. I buy them in packs of about 5 for $5 to $9 usually at Hobby Lobby or Walmart. You'll want a bunch of small sizes and nothing even close to as big around as your pinky finger. Those large, flat brushes I have in this pic are things I use for picture frames and stuff, not figures. Hobby Lobby stocks their brushes in 3 or 4 different places. Their most expensive stuff is where the entire row is paint brushes. Don't bother with that aisle unless you need really small brushes and the other aisles don't have any. I forgot what aisle I usually find cheap brushes on... You're just going to ruin them eventually anyway, so don't buy expensive ones. I always wash mine with Dial soap and water and store them upright when I am finished or if I am using a new, good brush, and I don't want it becoming a frayed out sloppy brush like the ones I use 99% of the time I paint... I wash it immediately after using it.
If you decide to start customizing, you do it at your own risk. Some things you'll read here may be dangerous. You shouldn't attempt anything mentioned without adult permission and supervision. DragonBall Figures and the writers of advice here are not liable for any injuries or damages that occur as a result of or in connection with attempts to follow suggestions written in this thread nor anywhere else on this website.
SUGGESTED MATERIALS
Don't waste your time and money on improper materials. I did the first few years I customized, and well, I regret what I had to learn along the way.
Clay:
Go ahead and buy some Aves Apoxie Sculpt and/or Aves Apoxie Clay. Both are extremely easy to work with, and take about 2 hours to get hard. For Sculpt, I recommend the color pink because the consistency is good and you can easily see what you're doing and paint over it. I don't recommend white, it is too sticky and doesn't have as consistent and smooth of a texture. For Apoxie Clay I recommend the Native color.
What's the difference between the two? Clay is easier to build things from scratch with. Sculpt is easier to use to modify something that already exists; like adding a layer on top of something, make a repair, etc. Want to sculpt something from scratch like a weapon, hair spikes, a head, a finger, a feather, a cape, or armor? Choose Apoxie Clay. Anything else, choose Sculpt. Only want one or the other? Choose Sculpt if you just want to modify existing parts, Clay if you want to sculpt things from scratch. Clay holds detail better because it is a stiffer material. It's hard to relate the two to something you'd be familiar with, but I'd say that Clay is like working with a Tootsie Roll or Starburst. It is always stiff, and joining two pieces of it together is not seamless without effort. It also is not very sticky after the first dozen minutes. Sculpt is more versatile, it's like getting chewing gum off your shoe at first, turns into kind of a heavy marshmallow, then eventually goes into a stale rock hard heavy marshmallow mode. It remains sticky for awhile and you won't have to use super glue in most cases. You can add water to Sculpt and make it smooth more easily, or even get it to the state of being like cake frosting almost (an annoying state unfortunately, but useful). Both dry rock hard and have zero flexibility.
I buy mine direct from www.avesstudio.com because it's the only place to get pink Apoxie Sculpt, and to me, pink is worth it!
Before using Apoxie, be sure to read the product instructions. I recommend you wear vinyl gloves when mixing the product as well as while sculpting with it, so your skin doesn't absorb anything or interact with the chemical reaction involved.

Required Tools:
I absolutely HATE IT when somebody writes advice and uses BS terms like "mild soap" (who in their right mind knows whether their soap is mild or not?!) so I'm going to tell you exactly what I use, whether it's a free endorsement for the product or not.
You'll need gloves. Feel free to shop around, because my suggestions aren't necessarily the BEST, they are just what I have and what I use.
My preferred type of gloves for doing x-acto knife work are mechanic style gloves you can get from Target and other places. You'll want to protect your hands when cutting and sanding. You should get many years out of a good pair, or several weeks out of a cheap piece of crap pair. Expect to spend $15 to $20 on a good pair. What is important is having good padding on the finger tips on the palm side, because that's the most likely place you are are going to hurt yourself. Don't misunderstand what I just said. You don't need or want padded palms. You need padded finger tips.
 What is secondarily important (and the reason I use mechanic gloves) is having protection for the top of your finger tips and your index finger's knuckle because those are two areas you can end up hurting too (though very rarely). You want the gloves to fit and be flexible, but thick on the finger tips on the palm side especially... and most especially... on the thumb. I use Mechanix ones currently, and my only complaints are that the velcro sometimes gets stuck on my clothes and couch, which damages the cloth, particularly on the couch, and I wish the thumb material was thicker. www.amazon.com/Mechanix-Wear-MG-05-010-Original-Glove/dp/B0001VNZQY
I have a pair of Coleman Outdoor Utility gloves, and I haven't used them for customizing yet, but they lack velcro (which is nice) and have decent palm-side finger protection. They lack extra protection on the tops though, but that isn't incredibly important. I think these are good, but they aren't as protective as Mechanix. www.amazon.com/Coleman-COOG-04-L-Outdoor-Utility-Glove/dp/B006NYJ382/ref=sr_1_sc_3?s=hi&ie=UTF8&qid=1402449009&sr=1-3-spell&keywords=colman+gloves

Avoid using Stanley Xtreme gloves, because they are pieces of crap that will develop holes in the finger tips very quickly. They are garbage for these purposes. AVOID THESE. They have heavily padded palms, so they are good if you are swinging from tree branch to tree branch like a monkey... but you're not.
www.amazon.com/Stanley-1879-50-Xtreme-Utility-Xtra-Large/dp/B002PHLZUU/ref=sr_1_1?s=hi&ie=UTF8&qid=1402449713&sr=1-1&keywords=stanley+xtreme+gloves
If you are going to be using a dremel, I recommend even thicker gloves to protect your finger tips. I wear Wells Lamont gloves exactly like these, but I do not wear them when doing other tasks because the Mechanix gloves (and similar) are adequate for preventing an x-acto knife blade from hurting me very much, and these aren't as protective against blades. I wear these only while dremeling. And although these are thicker, I don't think they are as durable as the Mechanix gloves. The thick leather on the finger tips sure has saved me from some pain via my Dremel... these may not be the best recommendation due to lack of durability, but if you get thick gloves that are durable, like ones capable of being used when working with welding and metal, you are going to lose flexibility, and then you're going to have a hard time holding your Dremel and doing delicate tasks.
www.amazon.com/Wells-Lamont-3210L-Deerskin-Spandex/dp/B000BPUBJE/ref=sr_1_9?s=hi&ie=UTF8&qid=1402448404&sr=1-9&keywords=wells+lamont+gloves

You absolutely have to have Safety Glasses. If you don't wear them while you're customizing, I'm sorry, but you're an idiot.
 < duuuuuuur )
 Best $15+ you'll ever spend, and your eyes are important. Take it from somebody who didn't start wearing them until 2002 after having an x-acto knife blade break and stick him in the eye.
 < arrrrrrrr! )
 Not fun! And a painful recovery process! Get a pair of fancy ones from a hardware store that look like wrap around sunglasses from the '90s. Don't get ones for shooting guns or going fishing or something. If you get small ones that look like sunglasses, you are barely protecting your eyes. If you get chemistry class goggles, you'll fog up and be uncomfortable. If you get cheap ones, you'll be uncomfortable in 5 seconds. I wear the ones I have, the entire time I am customizing (hours and hours) without discomfort. They protect your eyes from some glue fumes, paint splatter, your x-acto blade breaking, and tons of sanding dust. If you really want to be protected, get a face shield. I've considered it, because it isn't much fun having a blade break and the blade hit you in the cheek. I don't know what brand would be good, but they look like this:
www.amazon.com/3M-90028-Professional-Faceshield/dp/B000BO6RIE/ref=sr_1_fkmr0_1?s=hi&ie=UTF8&qid=1402451867&sr=1-1-fkmr0
You need to find a pair that will fit your face, which can be difficult, because they generally aren't in packages you can open and try on. Tip: bring your favorite pair of sunglasses in the store with you and compare the dimensions and curve (from an overhead view) to the glasses. The brand of mine is NEBO, I recommend them. I have a relatively wide face, a bigger than average head (size 7 and 3/4 baseball cap size or the 2nd to last setting on a one-size-fits-all adjustable cap), a somewhat flat forehead, but rounded brow area. If you have a very flat face, you will not like these according to an Amazon review. If you have a very narrow face, you may not like these because the glasses may not fit your small face. I just bought a second pair 12 years later, and the design has barely changed, and they kick ass for my type of face. Only $9 from Walmart (not sold in stores, online only), but $30 everywhere else. Get them.
www.walmart.com/ip/Nebo-Tools-X-Lens-Clear-Anti-Fog-Glasses/28378835
www.amazon.com/Nebo-4178-X-lens-Safety-Glasses/dp/B00577US7G/ref=sr_1_10?ie=UTF8&qid=1402450737&sr=8-10&keywords=nebo+glasses

I'm going to wear my new pair when sanding, because my old pair tends to fog up when I wear a dust mask. I'm going to wear my old pair for everything else.
Sculpting and Dismantling Tools:
Spend a bit of money on some sculpting tools made of metal, silicone, or plastic. All work well with Apoxie if you put a thin layer of Vaseline (Petroleum Jelly) on them and they won't stick to the Apoxie. I am not very happy with my metal sculpting tools because none of them leave a rounded edge, so they all leave square grooves. So I've ordered some plastic ones, and if I don't like them, I'll get silicone ones.

You'll need an x-acto knife or several for just about everything. I recommend the Medium Duty knife (thick metal handle) with #2 blades. You'll use this for chopping and most tasks. You'll also want a Light(?)/Normal Duty knife (about as big around as a pencil) with #11 blades. You'll use this for just about everything else that needs more precision because the blades are thinner. You might also want one of the knives that looks like an ice pick, though they are hard to find. It's useful for making holes (like a guide hole for a spot you want to drill), but you could use a nail instead if you can't find one. Get a small set of screw drivers. They usually sell them at dollar stores. They come in sets of like 5 to 6 little tiny metal screw drivers of various sizes. You'll mostly only need flathead ones, not phillips head.

You'll want a pair of very small needlenose pliers mostly for use in popping torsos open on Irwin figures (you'll need them for Jakks too sometimes). You'll need a pair of wire cutters for cutting things too hard to cut with an x-acto knife. I use a curved pair of needle nose pliers for a lot of things to save me from having to hold things at an awkward angle.

Assistant Tools:
Clothespins and small clamps are good for holding things you're painting and for holding things while they dry. Cuticle scissors for cutting finger nails are the best scissors you can buy for cutting paper and other small things with precision and they have curved blades. I sometimes use tweezers for holding tiny pieces I am trying to glue onto other things.

Sanding Tools:
For sanding, you have three options and you may want all three if you're like me. Let's start with the most expensive options to the cheapest options.
A dremel (has to be one with multiple speeds) is the most powerful and is what you'll use for heavy duty destroying operations that take forever by hand. You'll end up spending about $100 to $150 on one and the attachments/tips when all is said and done. If you'll be sanding plastic, you'll want to use one. You'll want to either run a small vacuum with the hose between your knees while you are using one and/or buy good quality dust masks to wear on your face. Dremels tear stuff up and throw the dust everywhere. You will need a shower when you are done, so try to work on multiple figures in one sitting.

You need to buy a small table vise if using a dremel. You should not hold what you're working on in most cases, even if you're wearing gloves. I did a lot of research and bought the best vice that exists. Don't waste your sweet time or precious money on something else. This thing is legit.
www.amazon.com/gp/product/B003IJLB9Y/ref=oh_details_o01_s00_i00?ie=UTF8&psc=1

These are the attachments I spent hours researching, inspecting, purchasing, etc. I made a chart for myself so I'd know the purpose of each and at what speed to use them. You can see 84922 attached to my dremel above... it's the most useful tip I own and the one I use most often. The second most useful is the one that will chew through stuff like a maniac. It's 9931. It could probably remove your entire hand if you let it in just a few seconds. Not included on this chart are the tips that work well with sanding Apoxie. Why? Well... I forgot to ever add them and they can be used at any speed. Identifying those tips at stores is easy though, because they are orange (terracotta) in color. You can use those tips at whatever speed you want. I only use my dremel on Apoxie if I made a major mistake and need to remove a lot of dry Apoxie quickly. It makes a big freaking mess if you do this without your vacuum running.

A manicure tool for about $20. It's like a gentle dremel because it comes with lots of tips and because the tips are all gentle enough for fingernails, they don't hurt you and you don't have to wear gloves when using one. I usually turn on the ceiling fan and use the tool over a trash can and blow lightly to keep the dust out of my lungs. When doing a lot of sanding, I keep a vacuum running with the hose between my knees. You'll find this tool isn't very useful for sanding plastic, but it works great on Apoxie and isn't very noisy.
Sanding blocks for about $0.25 to $4. I get mine from Sally's Beauty Supply. They are block shaped 4 sided foam sanding things. I like the white ones that are about the size of a Snickers bar and the "snack size" (lol) orange throw-away type for lighter duty polishing types of sanding. You'll want to use them over a trash can or sink and blow gently while doing it to keep the dust out of your nose. I use the less useful type that isn't very abrasive for times when I need to sand paint lumps out to get a smooth finish (after waiting almost a week for the paint to fully dry so it turns to dust when sanded instead of peeling off).

Glues:
On most figures, you can get away with using Loctite All Purpose Super Glue. It's about $4 at Walmart. Don't breathe the fumes, they hurt to breathe. If you get it on your skin immediately dunk your finger in water. Supposedly vegetable oil helps, but I have never tried it. If you glue your fingers together, immediately pull them apart, don't wait.

Any time you cut an arm in half to shorten it or swap hands on a figure though, you'll find that just moving the arm can break the super glue's bond. In this case, use Epoxy.

It comes in two tubes or a syringe. I prefer the two tubes type even though it's most likely sloppier. I'm not sure if the syringe type is a one-time-use or not, as I haven't used that type, but you should easily get 10 years out of two small tubes (like I have). Epoxy is a permanent solution, dries clear (yellows over time, but you'll be painting over it anyway usually), and dries in about 5 minutes. You can put a drop from each tube on a plastic plate and mix it with a toothpick and apply it with the toothpick or a plastic knife.
Paint:
I prefer Delta Ceramcoat Acrylic Craft Paint over any other option I've tried. It comes in a billion bright color, doesn't have lumps in it like the cheaper kinds, and is super easy to work with. There are more expensive options like Gamemasters and Model Masters, but DC will get you finished without much investment. It's between 75 cents and $1.50 a bottle. Sold at Hobby Lobby and some Michaels. If you can't find it, Folk Art paint is just fine, it's typically thicker though, so you have to shake it more thoroughly and mix a little bit of water on your paint palette (a plastic plate) before applying it or you'll get brush strokes on your figures. What I do is actually put a few drops of bottled water in it and shake it up, but when I use it, I still have to dilute it, because it's very thick. Both DC and Folk Art come in plastic bottles you squeeze and acrylic paint has basically no odor.

I always put my paint one drop at a time on a throw away plastic plate that I use for several months at a time. I prefer the nice quality SOLO transparent plates more than other types. They are nice and thick and don't distract you with overly bright colored plastic colors.
For clearcoat when you're done painting, I heavily recommend Testors Model Master's Flat Clear Acryl. It's $6 at Hobby Lobby and I've not been able to find it elsewhere. It is sold on the model car aisle with the paint there. You open it up, stir it (don't forget to stir it! Yes, it wastes some of it, but you need to scrape the bottom of the jar! I use the handle of my paint brush and then go wash it). You brush this stuff on and it is self-leveling, so you don't have to be fantastically neat and even with it. I don't recommend buying any sort of spray on clear. They suck. And they stink. And you have to spray them. Which sucks. If you want a glossy finish to match DeAgostini figures, I recommend Model Masters Semi-Gloss. It matches well.

Primer:
You usually don't need primer unless you want to be lazy and need to paint something without articulation a solid color pretty quickly. If you do, buy Plastic Primer, or Plastic Paint. Primer is kind of chalky and Plastic Paint is more like the texture of a car's paint.
This is a type of Plastic Primer I recommend if you want some. Overall, I consider it primarily useless, as it is not especially durable and makes details disappear.

I actually recommend you get Plastic Paint.

Comparisons are hard to show in pics, but I did my best. Both have a few coats of paint. It's difficult to get even coverage on small things, which is part of why I don't usually use primer or spray paint. I used it on Trunks' head because his head was made of a type of plastic that my paint wasn't sticking to well. I used primer on the arms because I was lazy and wanted to test them. As you can tell, the articulation scraped the primer right off. The Piccolo pants were painted with plastic paint because they were purple and it takes a LOT of coats of white acrylic to cover dark colors, so I saved some time and effort by using plastic paint for the first few coats.

You should be able to see that primer is kind of chalky (looks like pancake batter doesn't it?) and plastic paint is kind of like car paint (in areas that got good coverage). If you are dumb and buy a type of primer that is not specifically plastic primer, the chalky stuff in it is much thicker and almost like lint from your clothes dryer. Return it to the store and don't use it. Only use spray primer/paint that says it is specifically for plastic so it will be smooth.

Paint Brushes:
Gold Taklon brushes are what I recommend. You don't have to buy expensive ones either. I buy them in packs of about 5 for $5 to $9 usually at Hobby Lobby or Walmart. You'll want a bunch of small sizes and nothing even close to as big around as your pinky finger. Those large, flat brushes I have in this pic are things I use for picture frames and stuff, not figures. Hobby Lobby stocks their brushes in 3 or 4 different places. Their most expensive stuff is where the entire row is paint brushes. Don't bother with that aisle unless you need really small brushes and the other aisles don't have any. I forgot what aisle I usually find cheap brushes on...
 You're just going to ruin them eventually anyway, so don't buy expensive ones. I always wash mine with Dial soap and water and store them upright when I am finished or if I am using a new, good brush, and I don't want it becoming a frayed out sloppy brush like the ones I use 99% of the time I paint... I wash it immediately after using it.


