|
|
Post by Branjita on Oct 3, 2014 9:59:51 GMT -6
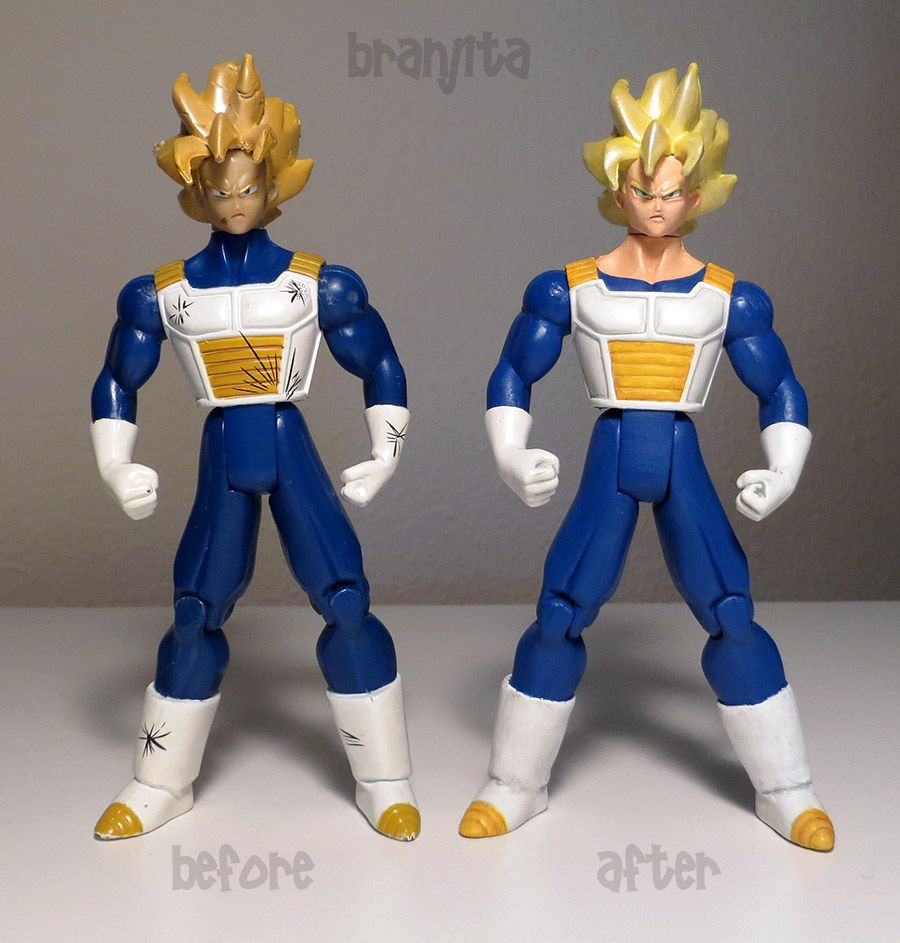
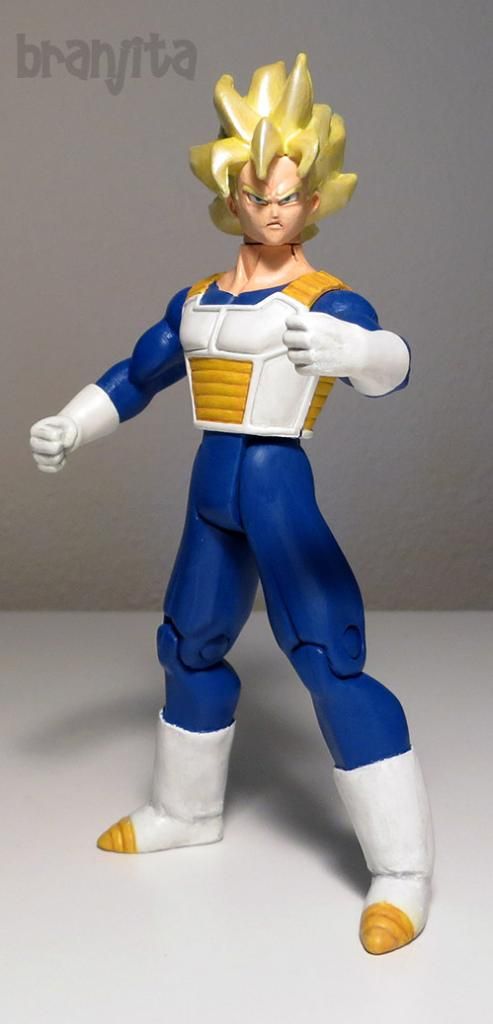
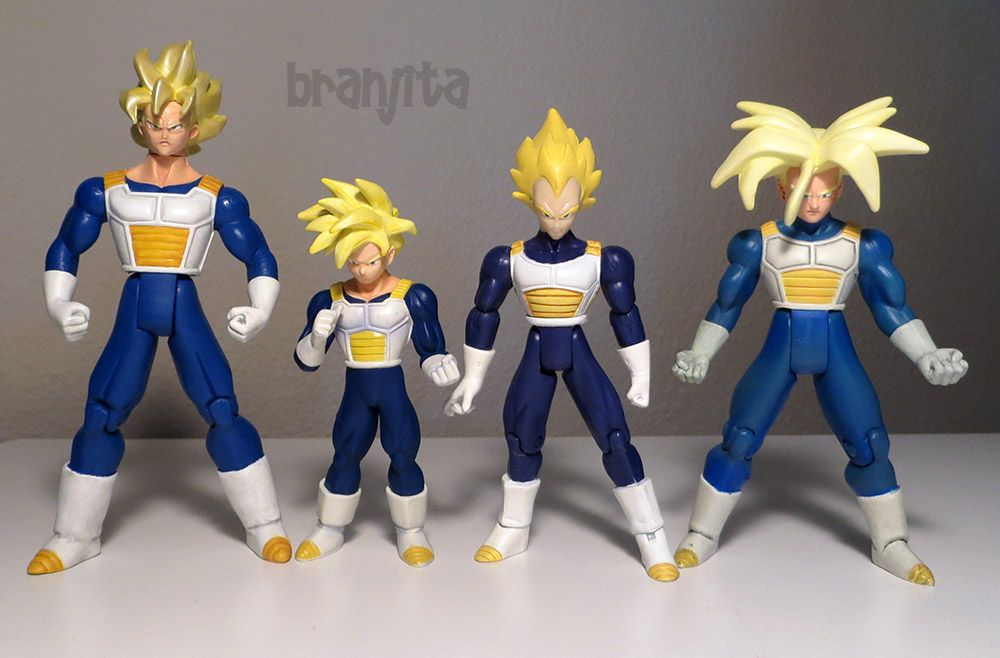
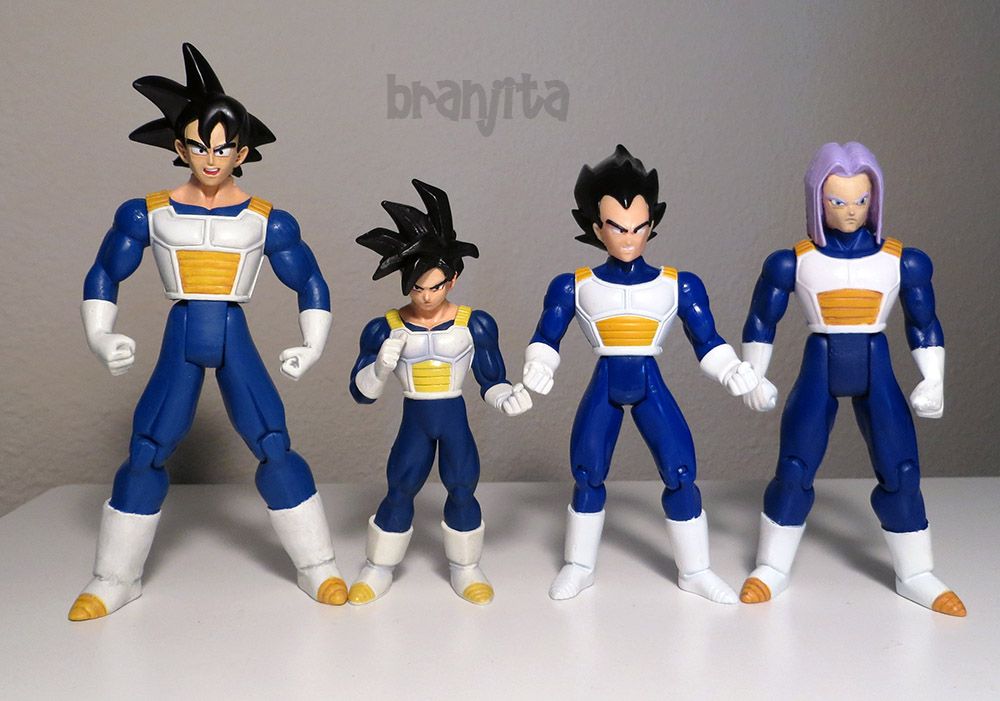
SS Goku in armorDifficulty: 6/10 How to make: I started with leftover parts from various SS Goku in armor figures. I probably have a real "before" picture, but I don't have time to find one, so we'll have to settle for a pic next to a trashed version of the same figure I started with. On this figure I remember it had some problems from being a used figure, it was the Jakks version with ugly battle damage and I believe it had some dents in the torso I had to fix(?). I remember I had shaved off the boots because I planned on using these legs for Zarbon, but I decided I needed to make an SS Goku in armor. Being too cheap to buy the nice Irwin version, and not liking the speckles in his hair anyway, I decided to just fix what I had. So that's what I did. It was probably a dumb decision because it took forever. After fixing all those sculpt problems I repainted the entire figure. Before/After  Articulation maintained.  Rotation i48.photobucket.com/albums/f232/BrangetaBB/IMG_1102.jpgi48.photobucket.com/albums/f232/BrangetaBB/IMG_1101.jpgi48.photobucket.com/albums/f232/BrangetaBB/IMG_1100.jpgi48.photobucket.com/albums/f232/BrangetaBB/IMG_1099.jpgi48.photobucket.com/albums/f232/BrangetaBB/IMG_1098.jpgi48.photobucket.com/albums/f232/BrangetaBB/IMG_1097.jpgi48.photobucket.com/albums/f232/BrangetaBB/IMG_1096.jpgi48.photobucket.com/albums/f232/BrangetaBB/IMG_1095.jpgAll my SS characters in armor. I went ahead and shaded the SS Vegeta's armor because it looked stupid not being shaded. At least SS Gohan's armor had deep definition, so I didn't shade him, but I wanted these to at least "sort of" match and Vegeta's armor was the color of Gohan's hair which looked weird. Looking at it now, I overdid it, but oh well, I don't care much lol.  Non-Super Saiyans. I only feel it's necessary to have 1 Goku and 1 Gohan in armor, because it isn't important enough to have the other versions of them. So I have SS Goku in armor and non-SS Gohan in armor by default. 
|
|
|
|
Post by Adrenaline on Oct 3, 2014 10:07:53 GMT -6
Exceptional paint job on that armor! But I'll say the same thing you said to me about my Olibu, the seam on his neck isn't sealed all the way. lol The before figure looks terrible now.
Anyways, glad to see you dishing these customs out. You're on a roll.
|
|
|
|
Post by Branjita on Oct 3, 2014 10:53:15 GMT -6
I've gotten lazy on sealing figures up now that I prefer to paint them entirely as separate pieces before gluing them shut. Sometimes I don't glue them shut, but this time I did.
|
|
|
|
Post by Adz on Oct 3, 2014 14:08:50 GMT -6
nice job... im still intrigued by the pearl in the hair... and its always cool to see what collection your current work fits into aswell... its like you finish one and then its like - pow! '' by the way..it goes with these other 7 I already did''!!!  |
|
|
|
Post by Branjita on Oct 3, 2014 16:11:19 GMT -6
The Delta Ceramcoat pearl worked really well as three coats of it unmixed with another color on top of solid yellow hair. My SS Trunks in that pic has hair painted my typical way--light yellow mixed with DecoArt pearl. As you can tell, the other way of doing it makes a lot more reflections, as you can barely tell there's any reflecting going on with Trunks. I think I did the same treatment to SS Gohan as SS Trunks. SS Vegeta's hair is just Jakks' solid yellow. The DecoArt you certainly wouldn't want to use straight, you have to mix it, because it has too much of a clear component to work by itself IMO. I'm a fan of the Delta Ceramcoat version now that I know it can be used by itself. Mixed with another color, and it just gets lost. My favorite pic I post is always the before and after. You can see how much work it was to detail the hands and repaint everything and how inferior the original looked.   |
|
|
|
Post by Marvelous Mark on Oct 4, 2014 13:00:28 GMT -6
Really liking the King Piccolo, it looks wonderful.
Is the before version of SS Goku's hair battle damaged too, or did someone just chew on it? lol
Either way, you can't tell it was messy in the after. Great work!
|
|
|
|
Post by Branjita on Oct 4, 2014 15:19:29 GMT -6
That "before" figure is actually a different one, I was in too big of a hurry to find the actual old pics from last year or the year before. But yes, that one was chewed on by a previous owner.
|
|
SupremeKai
Rank: Cooler's Squadron
   Watching you poop!
Posts: 1,091
|
Post by SupremeKai on Oct 4, 2014 16:06:30 GMT -6
He looked like a dog tried to eat his head off!
Good Job! I really like that pearlescent paint you've used for his hair, very shiny, shiny.
|
|
|
|
Post by ssj2dakota on Oct 4, 2014 19:15:39 GMT -6
Dang, you've been killin it lately with your customs! His hair looks especially nice, but all the colors look nice and vibrant! Great job, especially comparing before to after.
|
|
|
|
Post by Adrenaline on Oct 6, 2014 7:45:56 GMT -6
I wish Jakks was still around, so you could email that comparison to them. Their version looks like he's been smoking 5 packs a day.
|
|
|
|
Post by PGV on Oct 21, 2014 8:40:00 GMT -6
King Piccolo from DBDifficulty: 7/10 How to make: This is for my 4.5 to 5 inch DB collection I am trying to create mostly from scratch. I started with a Banpresto DX Action Figure Piccolo (you might be most familiar with the Raditz from the set) and I was severely disappointed with the figure. The articulation is basically worthless and just serves to make the figure ugly. The arms swing, swivel in an inhuman, weird location that is useless, barely bend at the elbow, and the wrists turn. The head and waist turn, which is useful. The legs look ball jointed, but aren't, they suck. The knees look really dumb when bent, there's no ankle articulation, and the swivel on the thigh is useless because the figure can't stand with the legs swiveled. I was hoping to make this figure into Cell Saga Piccolo since the arms are so beefy, but I changed my plans and made him into King Piccolo instead. I used the head from some bootleg King Piccolo super deformed figure that came with Roshi, Goku, Korin, etc. The face is a great sculpt, but needed some additions to the jaw and engineering to fit the neck. The shoulders were tiny and stupid looking so I sculpted some shirt on top. The hands I had were a fist and special beam cannon hand so I had to replace them (I'm not sure if there were alternate hands or not... I may have added wrist articulation, I don't remember), so I used hands from an old Spider-man figure of some ugly guy named Smythe I think. I added a lot of height to the lower legs because they were out of proportion for King Piccolo. I then sent the figure to Adrenaline for him to sculpt the clothing. He reworked what I did on the shirt, made the pants go higher, made him less skinny, sculpted some details to the inner thighs, resculpted the entire lower legs, and as I requested, made his feet enormous, since they were in the anime. Once I got the figure back, I did a minor amount of sanding, and gave him a full repaint. Painting Piccolo arms is annoying, but I practically have it down to a science now. I finished it off with one of the stickers I designed, the largest King Piccolo sticker from the Style 2 sticker sheets I sell. Before/After  Bran i really love the job you did on this one  |
|
|
|
Post by Branjita on Dec 4, 2014 16:42:50 GMT -6
|
|
|
|
Post by Adrenaline on Dec 5, 2014 16:35:56 GMT -6
Sweet. Good additions!
|
|
|
|
Post by Branjita on Jan 8, 2015 17:22:36 GMT -6
|
|
|
|
Post by Adrenaline on Jan 8, 2015 18:40:42 GMT -6
You wouldn't know I sliced off an inch of his robe at the bottom. I was glad I did that so smooth. And how awesome that the flat clear acryl hides that fog!
|
|