|
|
Post by Branjita on Aug 14, 2013 11:59:42 GMT -6
Cell Saga PiccoloDifficulty: 2/10 overall How to make: I made this Piccolo from a Piccolo I may have posted somewhere earlier in this topic; a Jakks Piccolo I made replacement antennas for. I didn't paint the head very well and I didn't like it. Well, I had this Chara Puchi Nail bootleg figure I bought months ago and I never used it or had any plans for it, so I figured I better use it. I took the head off, trimmed it with my x-acto, took a lot of the nose off, and sanded a negligible amount of material off the antennas. I planned on fully repainting the body, but since I have already made one badass fully repainted Piccolo and am currently working on a second one, I didn't think I needed to. I matched the green to the rest of the body as best I could (pretty darn close!!!) and repainted the head and neck/chest. After that, I carefully boiled only the legs on the figure, and I reset them into the position I wanted, wedged a fork between his legs to make sure it held, let it cool a bit in the refrigerator, and then ran cold water over the legs to make sure they would stay spread like this permanently. Turned out great. 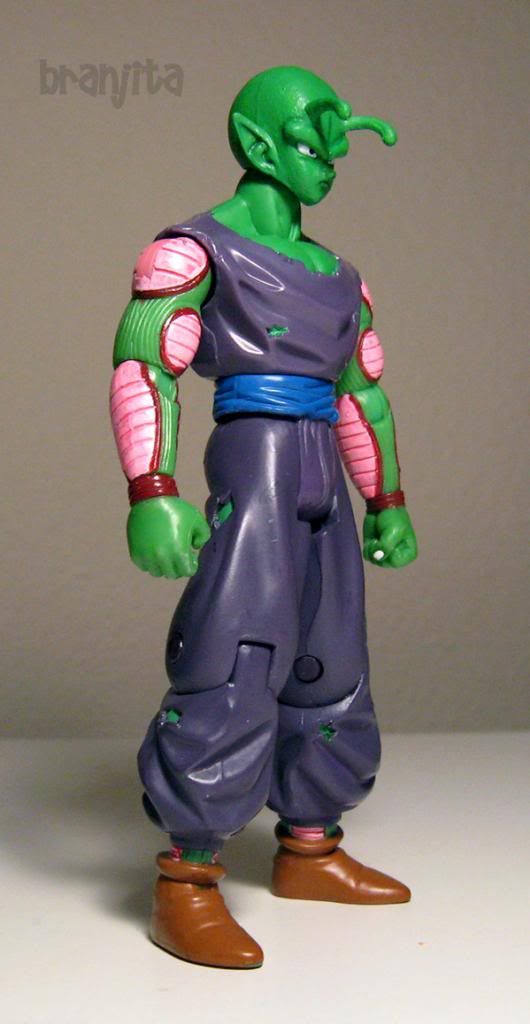 i48.photobucket.com/albums/f232/BrangetaBB/IMG_4412-1.jpgi48.photobucket.com/albums/f232/BrangetaBB/IMG_4411-1.jpgi48.photobucket.com/albums/f232/BrangetaBB/IMG_4410-1.jpgi48.photobucket.com/albums/f232/BrangetaBB/IMG_4408.jpgi48.photobucket.com/albums/f232/BrangetaBB/IMG_4407.jpgi48.photobucket.com/albums/f232/BrangetaBB/IMG_4406.jpgi48.photobucket.com/albums/f232/BrangetaBB/IMG_4405.jpg i48.photobucket.com/albums/f232/BrangetaBB/IMG_4412-1.jpgi48.photobucket.com/albums/f232/BrangetaBB/IMG_4411-1.jpgi48.photobucket.com/albums/f232/BrangetaBB/IMG_4410-1.jpgi48.photobucket.com/albums/f232/BrangetaBB/IMG_4408.jpgi48.photobucket.com/albums/f232/BrangetaBB/IMG_4407.jpgi48.photobucket.com/albums/f232/BrangetaBB/IMG_4406.jpgi48.photobucket.com/albums/f232/BrangetaBB/IMG_4405.jpg
|
|
|
|
Post by Branjita on Aug 14, 2013 11:59:54 GMT -6
ANY Saga PiccoloDifficulty: 10/10 How to make: This was a very complicated custom. First, I started with a Bandai Ultimate Figure Series Piccolo. The figure came in great shape, but like many of them, the arms broke at the elbows basically immediately--the forearm plastic tore. So I had to fix that first. These figures are made from a different plastic from Irwin and Jakks figures. Super glue actually works as a permanent or near-permanent fix. After that I worked on shortening the pegs that hold the legs. The official figure has legs that stick out too much at the hips. I don't have a picture to show this unfortunately. Strangely, the bootleg of the Kai version of this figure seems to have this corrected based on pics. This process was very difficult as the plastic this figure is made from is very hard. To be honest, I don't remember how I even succeeded in doing it; you'd have to look at my WIP topic. I tried repairing the shortened peg with epoxy several times and it never worked. Then I tried super glue and it worked permanently. The first time super glue has EVER been a permanent solution on any figure I've ever customized. Epoxy is usually the answer. I don't remember the exact order I went through, but I decided the arms were too long at the forearms and I tried cutting them. I made it through one of them by hand, and it was incredibly difficult. I tried doing the other one and ended up using my new dremel with the cutting disk attachment. I used the kienzan/destructo disk to cut the arms at the wrist, and a spot higher up on his forearms so I could remove a chunk and still maintain the hand switching ability. I then used a different dremel tip to basically destroy the heck out of the forearms. They were too wide to simply glue the wrist back onto, plus the forearm sculpt SUCKED! After using that tip of mass destruction, I used a different one to deburr my destuction and smooth everything out. I then sculpted a new skin for these arms. Sculpting done, I went through the extremely tedious process of painting him. It's convenient that parts of UFS figures are removable, this made painting easier, but not easy. I probably have 40 hours in this paint job. Maybe more. If you look closely at some of these comparison photos, I think UFS or Jakks copied the mold for the cape as well as the torso and then made their own custom. It's almost like they are identical in some places. If you can't tell, I am very happy with this figure. I am also very happy it is the last Piccolo I will ever have to paint. I only have three Namekians left to make: Kami, Moori, and Tsuno but they won't be for a long, long time. 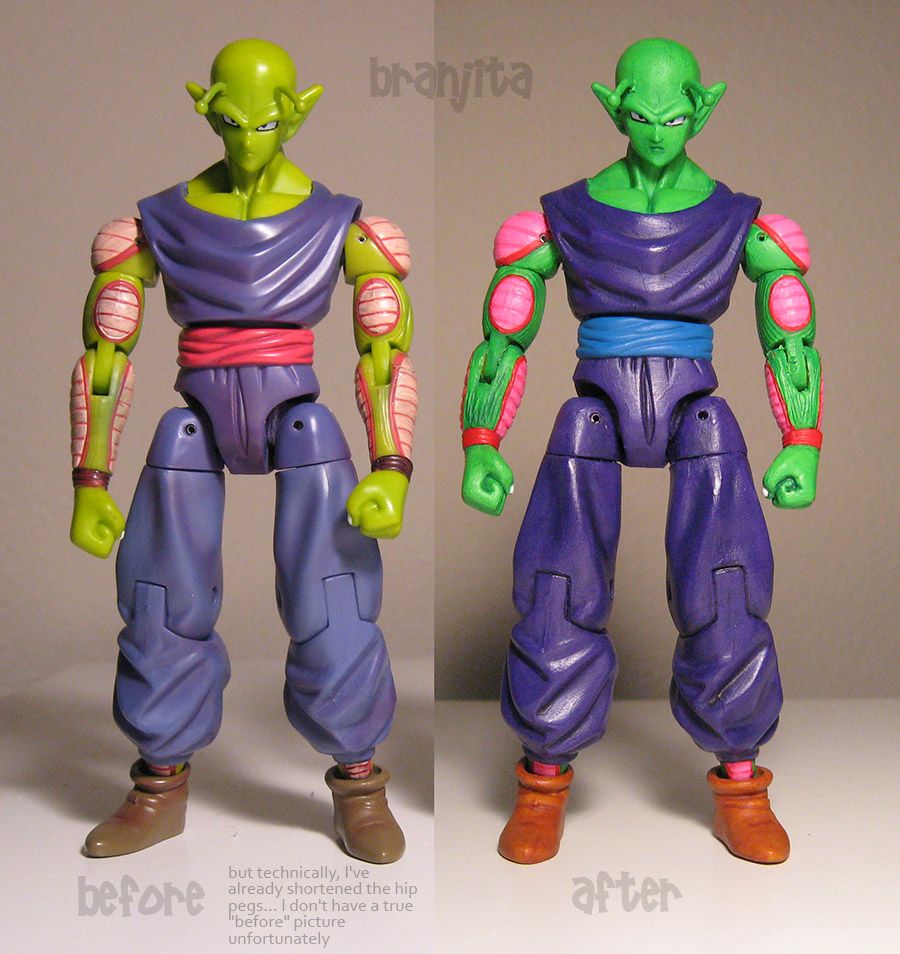 i48.photobucket.com/albums/f232/BrangetaBB/IMG_4439.jpgi48.photobucket.com/albums/f232/BrangetaBB/IMG_4438.jpgi48.photobucket.com/albums/f232/BrangetaBB/IMG_4437.jpgi48.photobucket.com/albums/f232/BrangetaBB/IMG_4436.jpgi48.photobucket.com/albums/f232/BrangetaBB/IMG_4435.jpgi48.photobucket.com/albums/f232/BrangetaBB/IMG_4434.jpgi48.photobucket.com/albums/f232/BrangetaBB/IMG_4433.jpg i48.photobucket.com/albums/f232/BrangetaBB/IMG_4439.jpgi48.photobucket.com/albums/f232/BrangetaBB/IMG_4438.jpgi48.photobucket.com/albums/f232/BrangetaBB/IMG_4437.jpgi48.photobucket.com/albums/f232/BrangetaBB/IMG_4436.jpgi48.photobucket.com/albums/f232/BrangetaBB/IMG_4435.jpgi48.photobucket.com/albums/f232/BrangetaBB/IMG_4434.jpgi48.photobucket.com/albums/f232/BrangetaBB/IMG_4433.jpg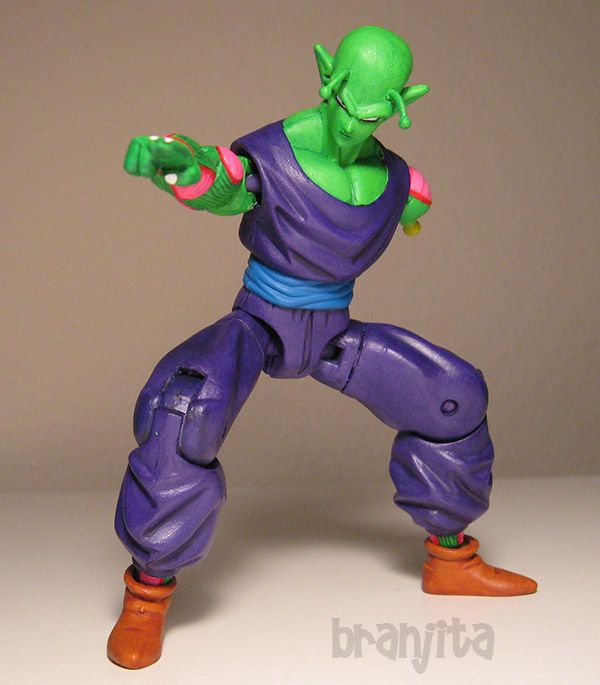 i48.photobucket.com/albums/f232/BrangetaBB/IMG_4426.jpg i48.photobucket.com/albums/f232/BrangetaBB/IMG_4426.jpg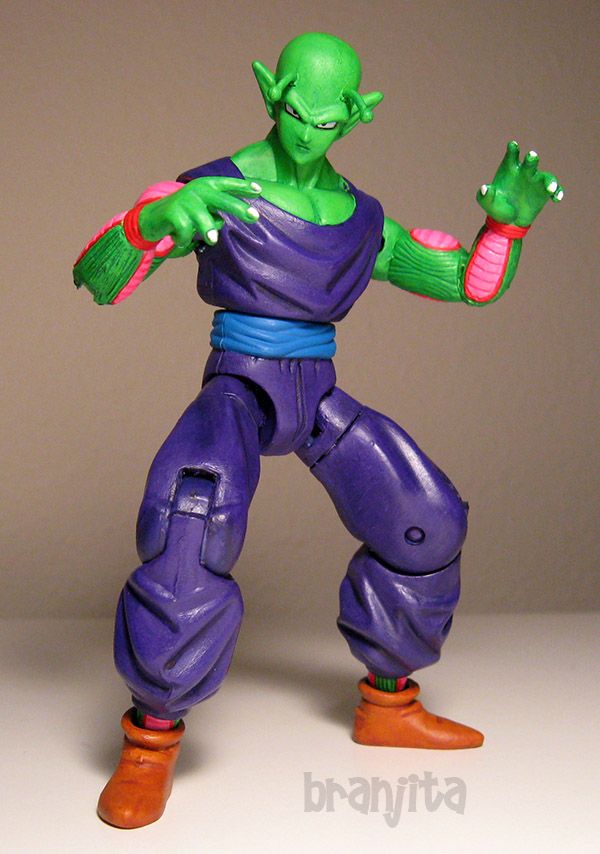 i48.photobucket.com/albums/f232/BrangetaBB/IMG_4423.jpg i48.photobucket.com/albums/f232/BrangetaBB/IMG_4423.jpg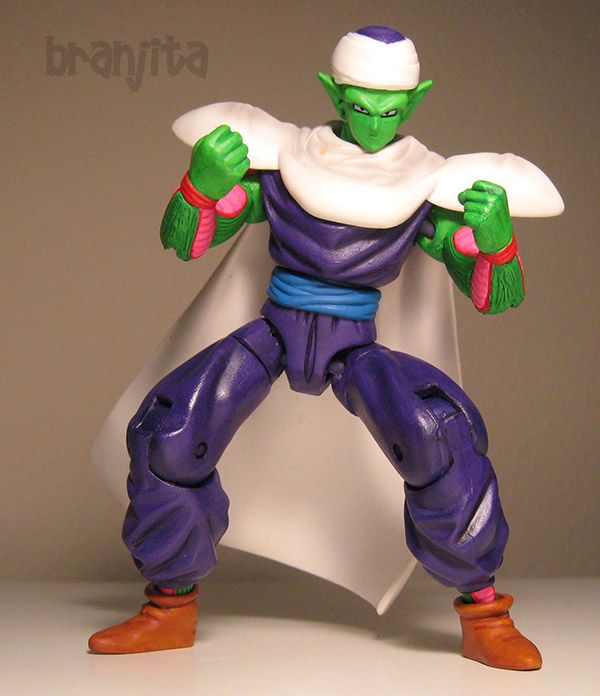 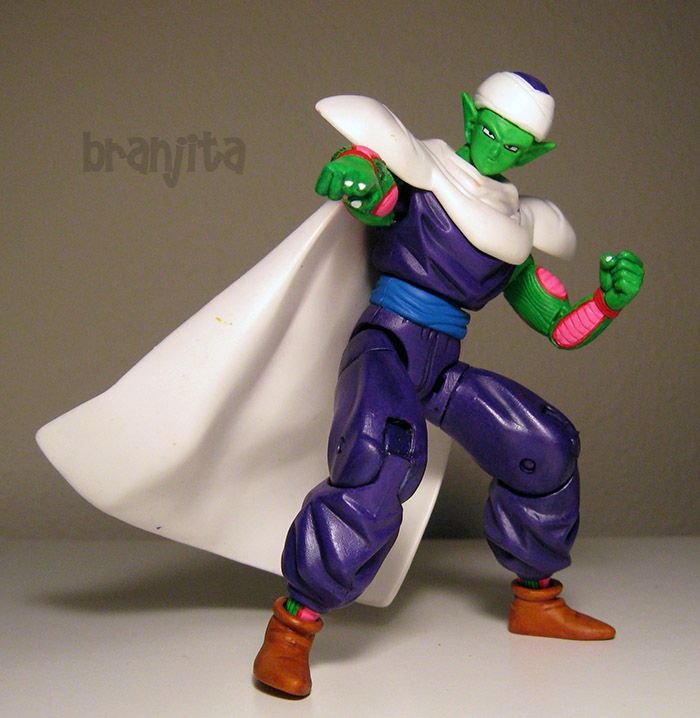 i48.photobucket.com/albums/f232/BrangetaBB/IMG_4420.jpgi48.photobucket.com/albums/f232/BrangetaBB/IMG_4419.jpgi48.photobucket.com/albums/f232/BrangetaBB/IMG_4418.jpg i48.photobucket.com/albums/f232/BrangetaBB/IMG_4420.jpgi48.photobucket.com/albums/f232/BrangetaBB/IMG_4419.jpgi48.photobucket.com/albums/f232/BrangetaBB/IMG_4418.jpg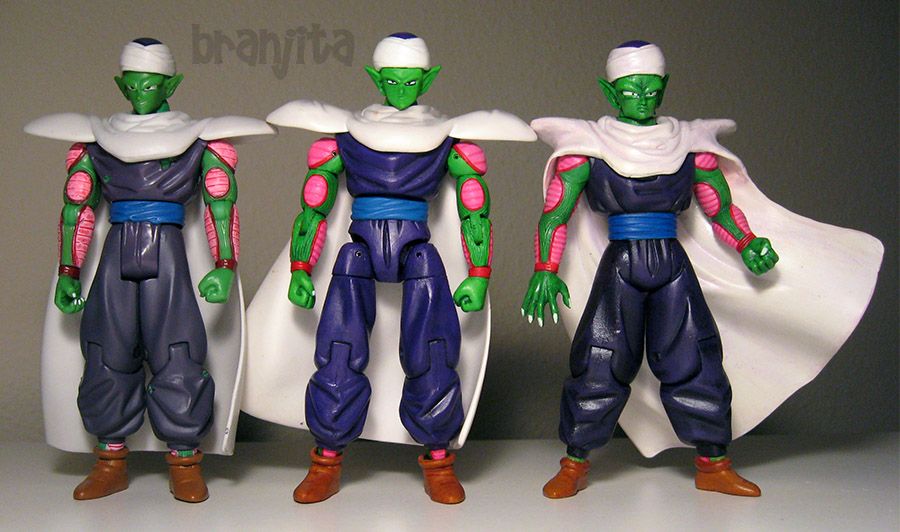 i48.photobucket.com/albums/f232/BrangetaBB/IMG_4416.jpg i48.photobucket.com/albums/f232/BrangetaBB/IMG_4416.jpg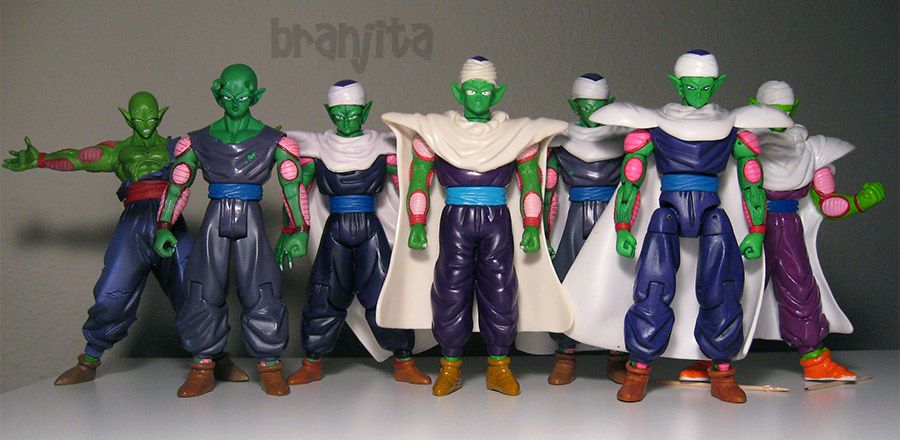 i48.photobucket.com/albums/f232/BrangetaBB/IMG_4448.jpg i48.photobucket.com/albums/f232/BrangetaBB/IMG_4448.jpg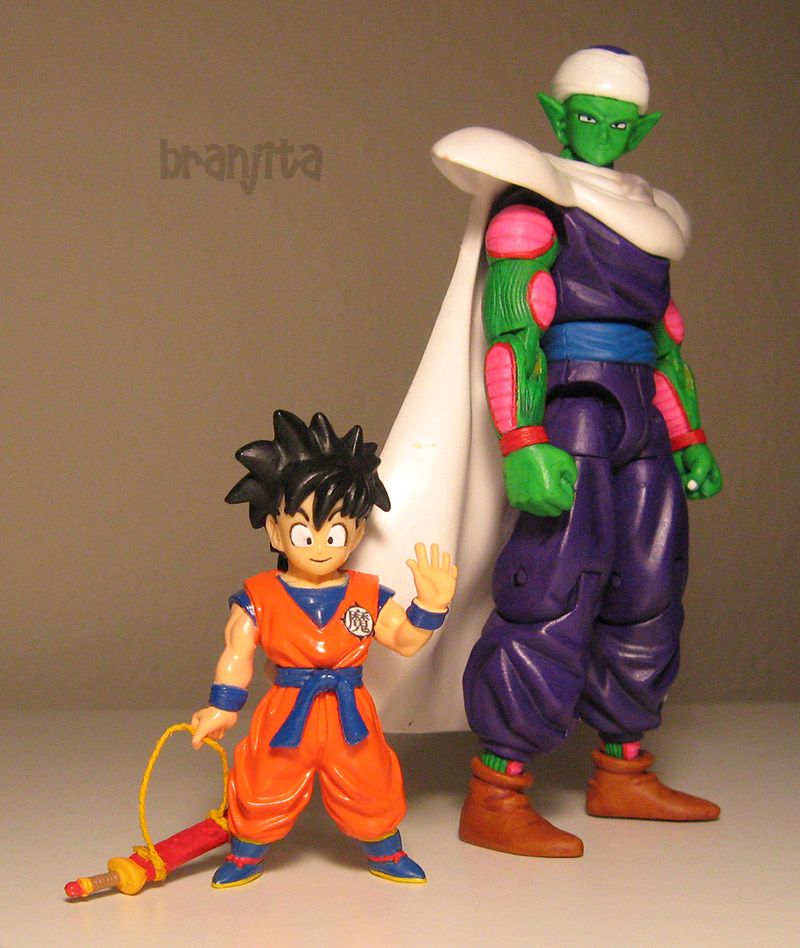 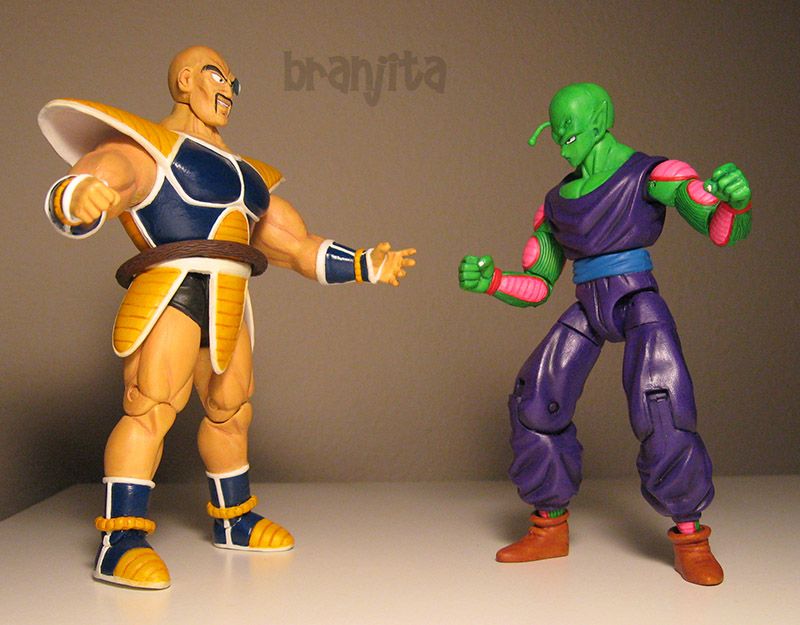 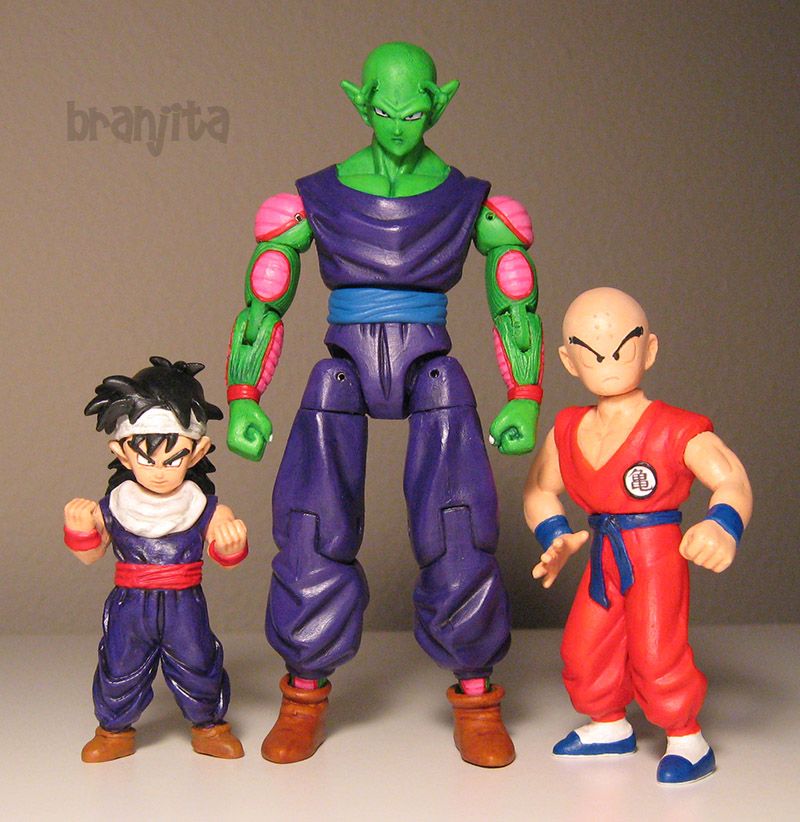 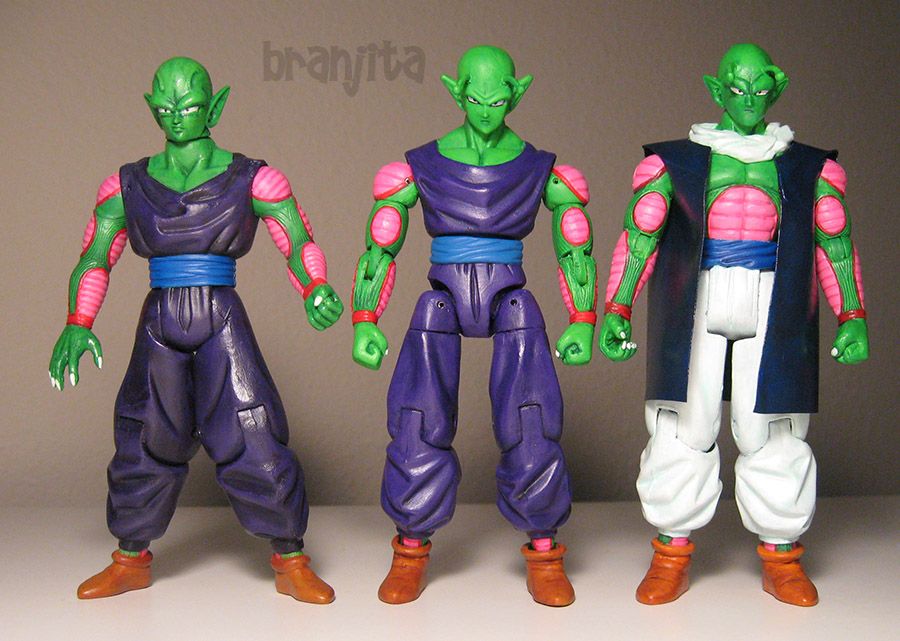 i48.photobucket.com/albums/f232/BrangetaBB/IMG_4443.jpgi48.photobucket.com/albums/f232/BrangetaBB/IMG_4442.jpgi48.photobucket.com/albums/f232/BrangetaBB/IMG_4441.jpgi48.photobucket.com/albums/f232/BrangetaBB/IMG_4440.jpgi48.photobucket.com/albums/f232/BrangetaBB/IMG_4428.jpg i48.photobucket.com/albums/f232/BrangetaBB/IMG_4443.jpgi48.photobucket.com/albums/f232/BrangetaBB/IMG_4442.jpgi48.photobucket.com/albums/f232/BrangetaBB/IMG_4441.jpgi48.photobucket.com/albums/f232/BrangetaBB/IMG_4440.jpgi48.photobucket.com/albums/f232/BrangetaBB/IMG_4428.jpg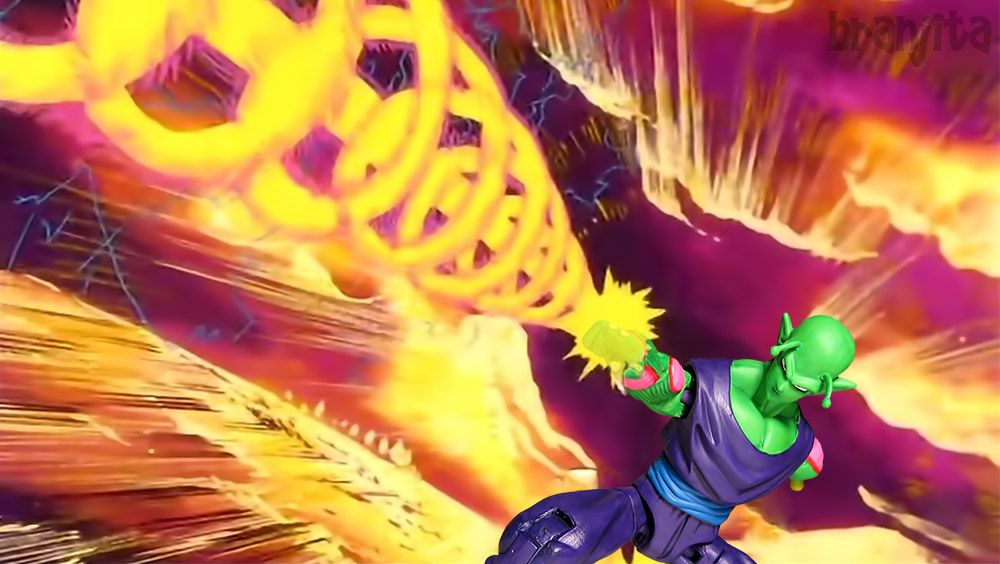
|
|
|
|
Post by Branjita on Aug 14, 2013 12:00:27 GMT -6
|
|
|
|
Post by Branjita on Aug 14, 2013 12:00:35 GMT -6
|
|
|
|
Post by Branjita on Aug 14, 2013 12:00:46 GMT -6
|
|
|
|
Post by Branjita on Aug 14, 2013 12:00:53 GMT -6
|
|
|
|
Post by Branjita on Aug 14, 2013 12:01:01 GMT -6
|
|
|
|
Post by Branjita on Aug 14, 2013 12:01:10 GMT -6
|
|
|
|
Post by Branjita on Aug 14, 2013 12:01:21 GMT -6
Saiyan Saga Goku after King Kai's trainingDifficulty: 0.5/10 How to make: I decided I needed a Goku with a King Kai symbol on his back in my collection and my only figure left to use for him was the completely mint, never been played with series 4 Goku I've had since new that I use in figure comparison pictures. I couldn't bear to use him. I found a real cheap one on ebay, and surprisingly, I won him without spending very much at all! To my surprise, he was also completely mint and never been played with, so that was a nice surprise. I painted his boot lines proper for that saga, and then proceeded to glue my only large King Kai symbol on his back... crooked. I glued the 5% smaller one on top of it and colored the edges black... and then put the Master Roshi turtle symbol on the front. A little bit of clear and he was done. 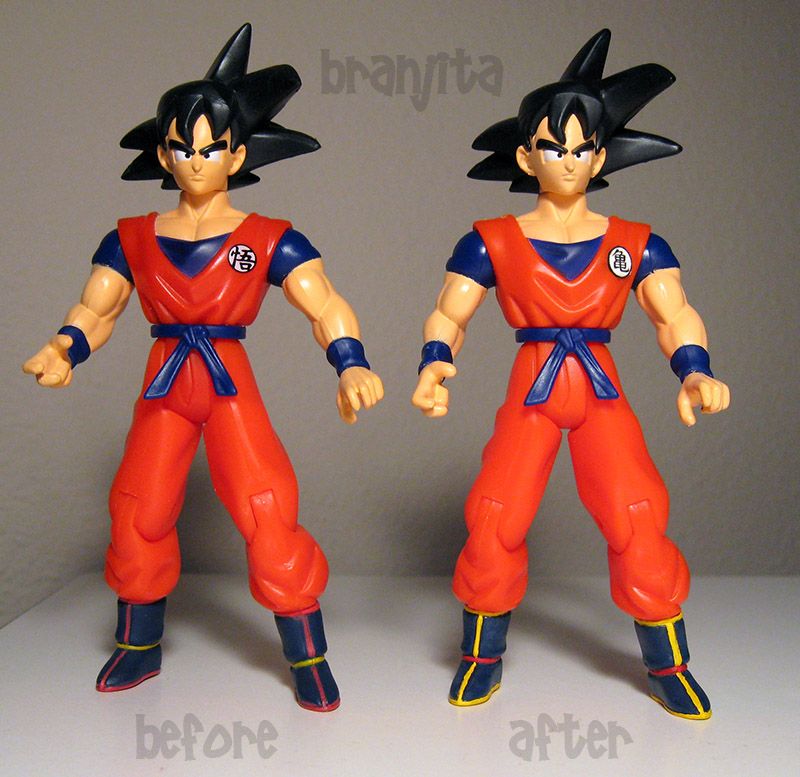 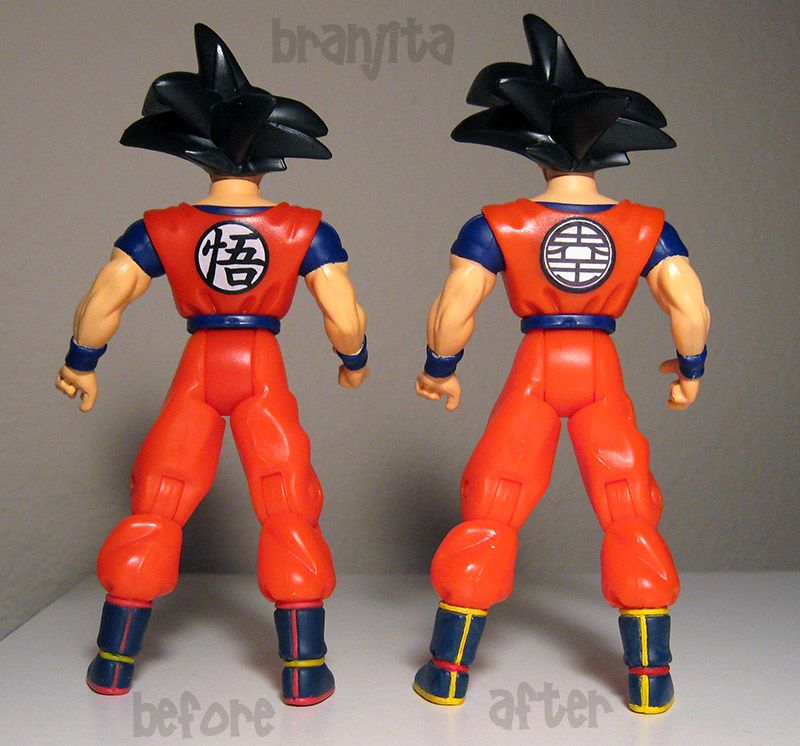
|
|
|
|
Post by Branjita on Aug 14, 2013 12:01:40 GMT -6
|
|
|
|
Post by Branjita on Aug 14, 2013 12:01:49 GMT -6
|
|
|
|
Post by Branjita on Aug 14, 2013 12:01:57 GMT -6
|
|
|
|
Post by Branjita on Aug 14, 2013 12:02:05 GMT -6
|
|
|
|
Post by Branjita on Aug 14, 2013 12:02:14 GMT -6
Future Trunks from DBZ movie 9, Bojack UnboundDifficulty: 7/10 How to make: This figure was very difficult, mostly because I wanted him articulated. I used a Real Works head that is basically just repainted with a heavily modified neck. The body is a bootleg SS Trunks HSCF figure. It's important you get the SS version, because the regular version is (for whatever reason) a much taller figure. I shaved off the sword and strap and did a lot of fixing to this body, especially to the neck, which I articulated for a nearly useless reason. The jacket was insane. I used Irwin SZF SS Trunks arms and articulated them into the jacket. It was very difficult. Painting this figure was a very long process because Trunks as a character is composed of very unusual colors. Despite owning over 40 colors of paint (estimated) I still had to mix at least two colors together for every single color on this guy! Even the black is mixed to be a darker black because I wanted it to look darker than regular. Overall, this might be the longest time I've spent on a paint job in a long time, simply because of how many colors were involved, and having to go back and repaint things because they were too dark, too blue, too purple, too yellow, etc. I'm very happy with the results and am happy I got to recreate my favorite Trunks scene: him getting his teeth knocked in by Tien! i48.photobucket.com/albums/f232/BrangetaBB/IMG_4876.jpg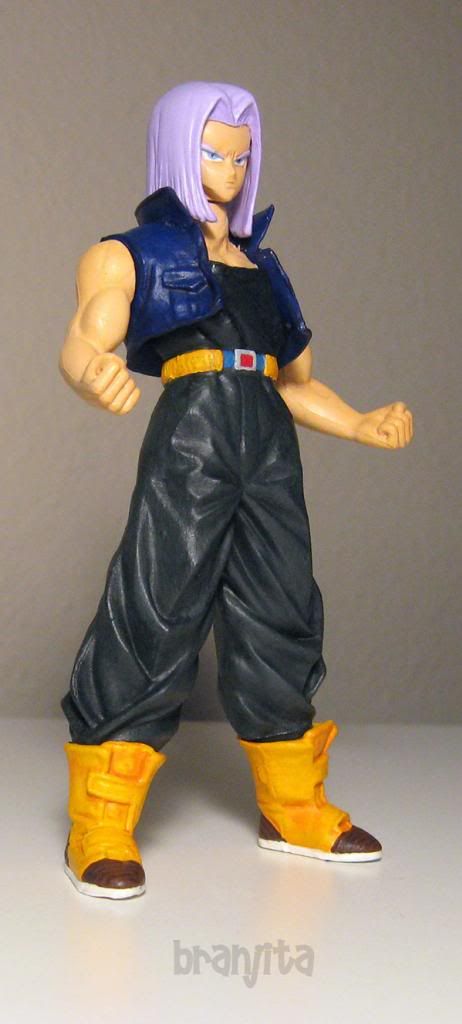 i48.photobucket.com/albums/f232/BrangetaBB/IMG_4874.jpgi48.photobucket.com/albums/f232/BrangetaBB/IMG_4873.jpgi48.photobucket.com/albums/f232/BrangetaBB/IMG_4872.jpgi48.photobucket.com/albums/f232/BrangetaBB/IMG_4871.jpgi48.photobucket.com/albums/f232/BrangetaBB/IMG_4870.jpgi48.photobucket.com/albums/f232/BrangetaBB/IMG_4869.jpgi48.photobucket.com/albums/f232/BrangetaBB/IMG_4868.jpg i48.photobucket.com/albums/f232/BrangetaBB/IMG_4874.jpgi48.photobucket.com/albums/f232/BrangetaBB/IMG_4873.jpgi48.photobucket.com/albums/f232/BrangetaBB/IMG_4872.jpgi48.photobucket.com/albums/f232/BrangetaBB/IMG_4871.jpgi48.photobucket.com/albums/f232/BrangetaBB/IMG_4870.jpgi48.photobucket.com/albums/f232/BrangetaBB/IMG_4869.jpgi48.photobucket.com/albums/f232/BrangetaBB/IMG_4868.jpg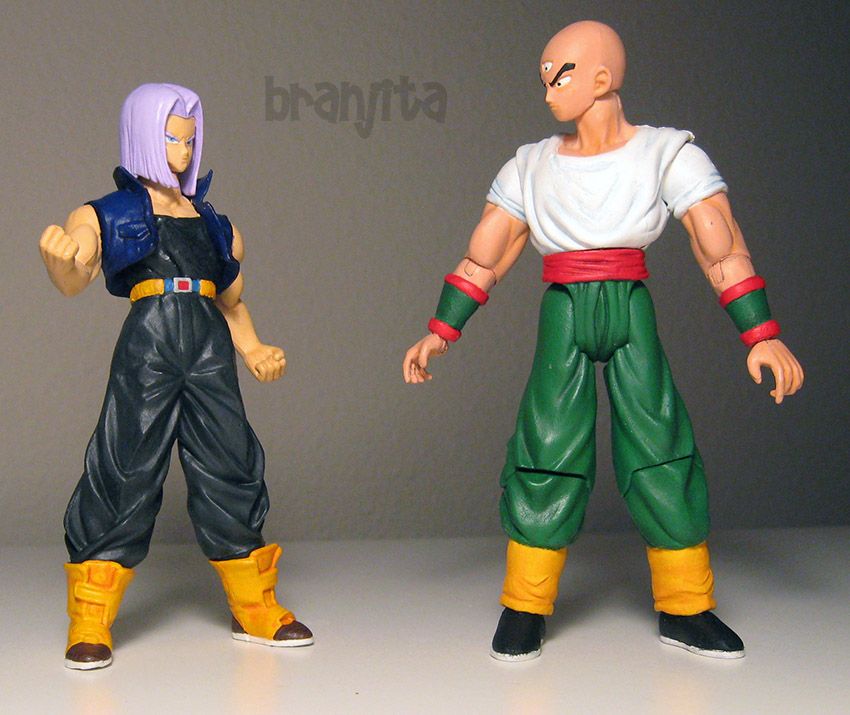 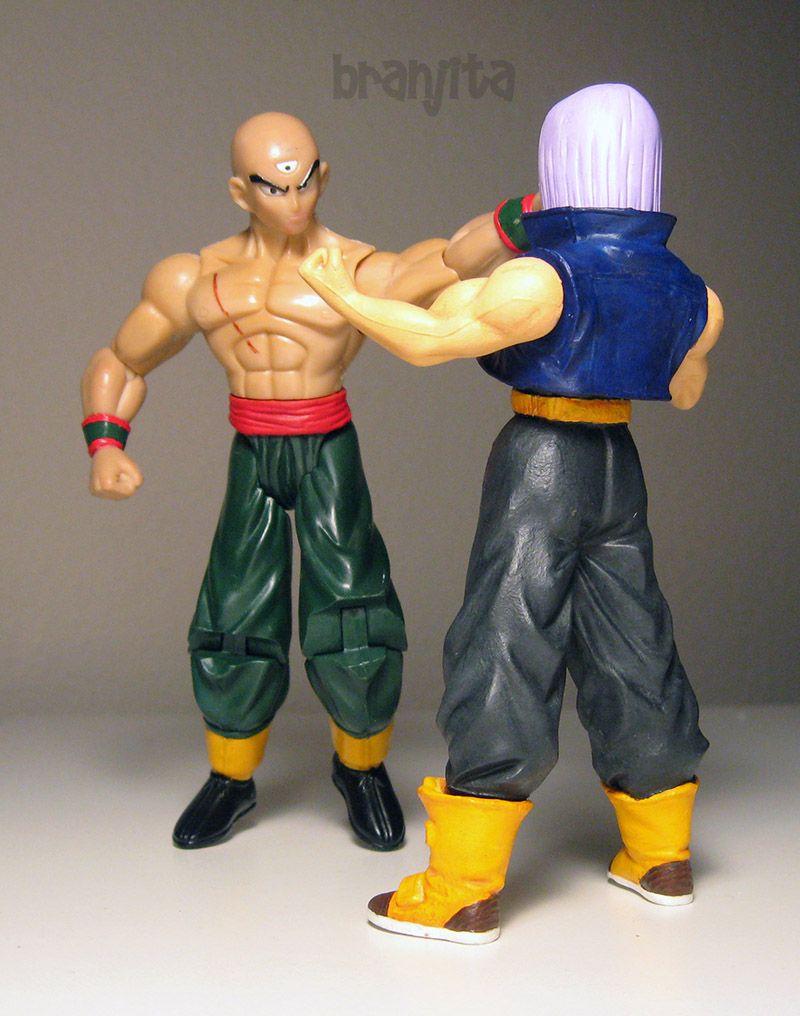 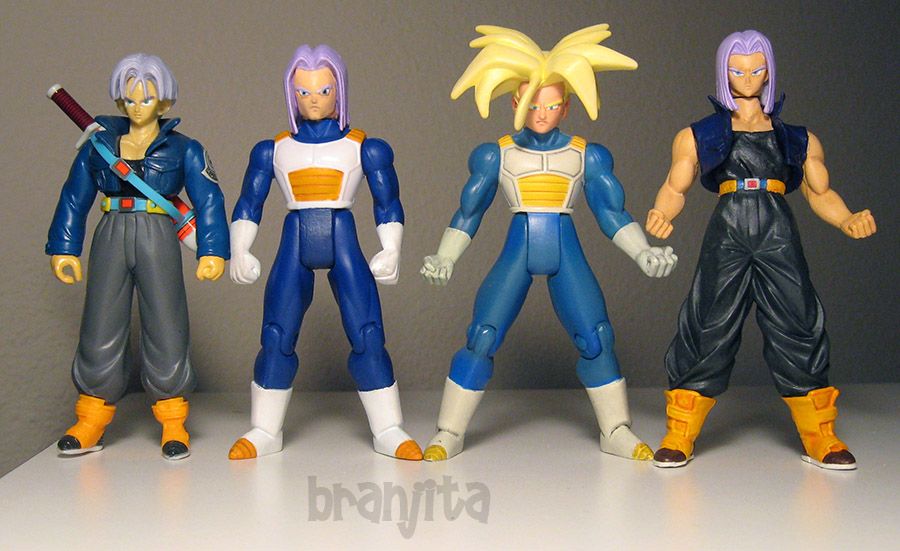
|
|
|
|
Post by Branjita on Aug 14, 2013 12:02:24 GMT -6
|
|


